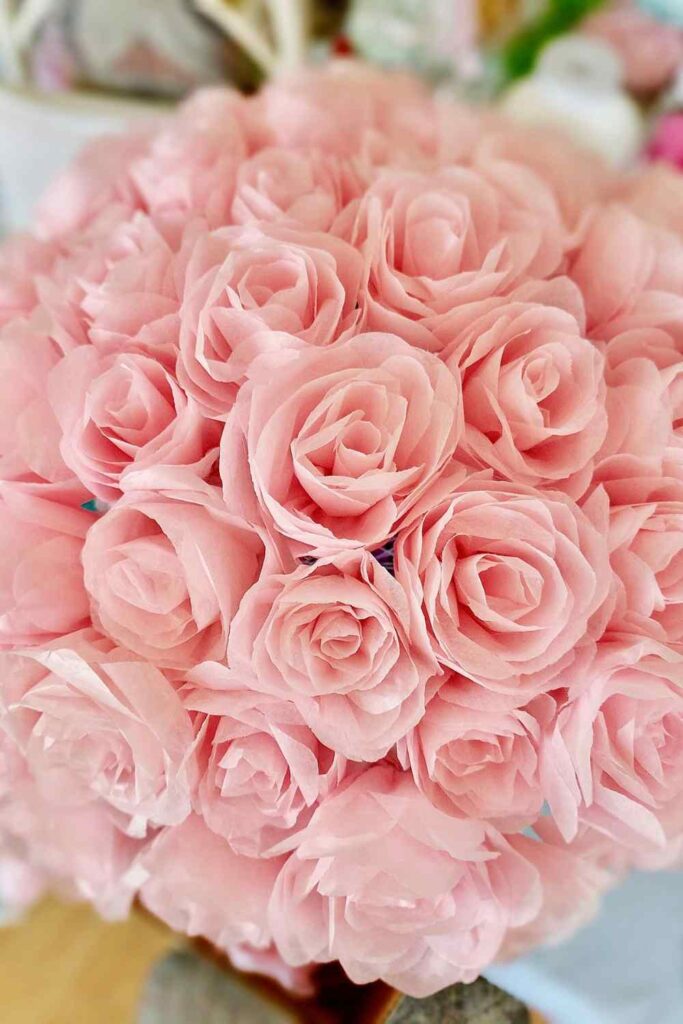
These Tissue Paper Flowers will Make an Enormous Impression
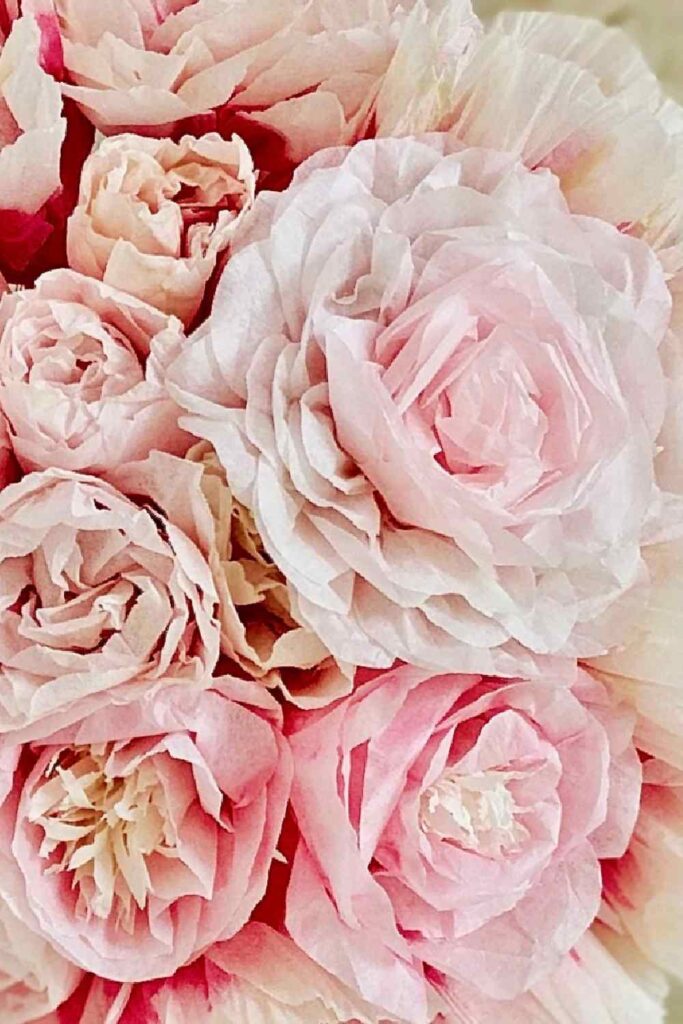
Tissue paper flowers are an easy and artistic way to add a unique touch to any room or adorn special occasion spaces. Their vibrant colours and basic construction offer a great way to add liveliness to events without breaking the bank.
Subscribe to your creativity and use them to create colourful garlands, wall art, wreaths, and more.
Apart from a plan to beautify your place, you’ll need little but tissue, scissors and glue, and you’ll stay on budget. Not to mention you’ll save time. Quick decorating with tissue paper flowers can mean filling a vase and brightening a room; the idea is typical.
Otherwise, you can subscribe to your creativity and use them to create colourful garlands, wall art, wreaths, and more. Remember, they’re easy, meaning you don’t have to stop at bouquets or vases.
Fill Your Rooms with Gorgeous Tissue Paper Flowers
Use them to give your rooms a fresh look and create an atmosphere; it’s easy as choosing your paper colours and gathering supporting materials. Sizes and lengths are up to you, but it’s a great starting point.
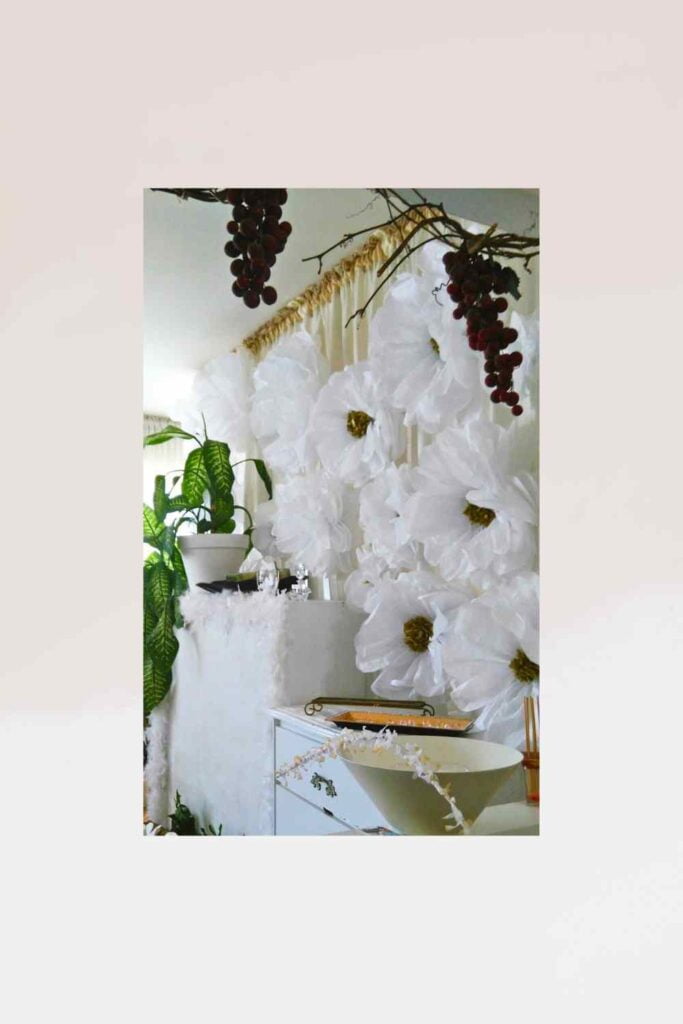
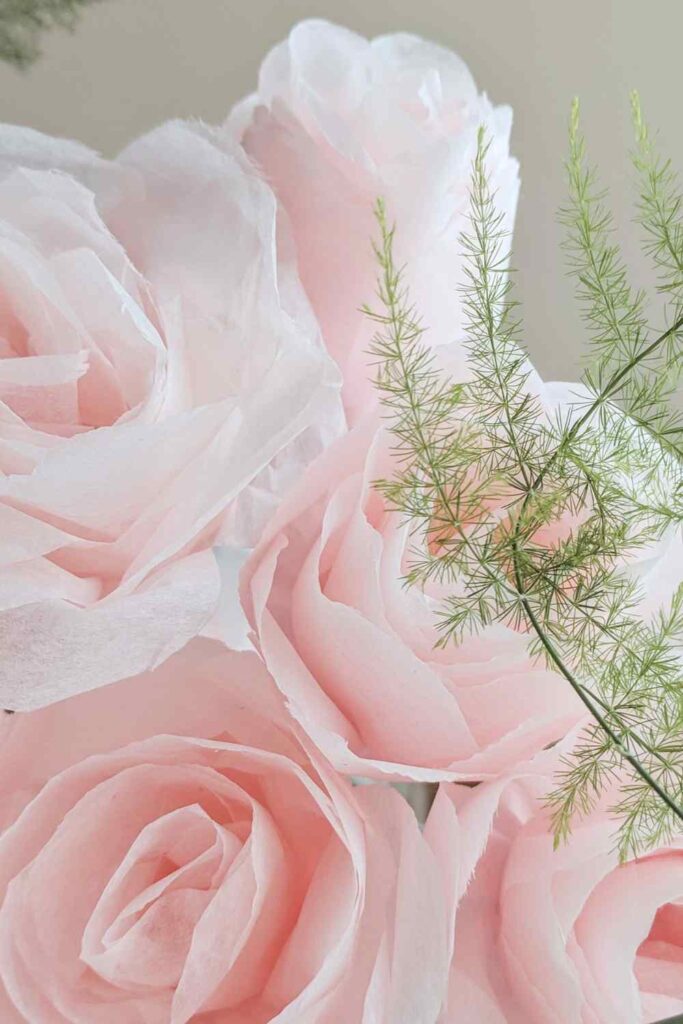
Use the blooms alone or try pairing them with dry branches. From experience, I can tell you, it can create a spectacular impact. Further, you can opt for making your own paper leaves and foliage. Create a bunch, place them wherever you wish and enjoy! You donʼt need a special occasion to appreciate these beauties.
On that account – how do you make tissue paper flowers?
Start with tissue, glue, and stems. You’ll find many ways to make tissue paper flowers, but this method needs minimal effort and basic skills, using three steps I hope you find helpful.
Supplies You Will Need
You won’t need every item listed below to make tissue paper flowers, including a ruler; you can eyeball dimensions. Explore a variety of crafting options.
- Tissue paper
- Wire stems or wooden skewers
- Cotton swabs
- Craft paint, food coloring, ink or markers for colouring buds.
- Ruler
- Scissors
- Floral tape or other
- Glue sticks
- Hot glue gun
- Glue
- Needle, thread and sewing machine and ruffle attachment if using. Or use any of the associated gathering methods outlined below.
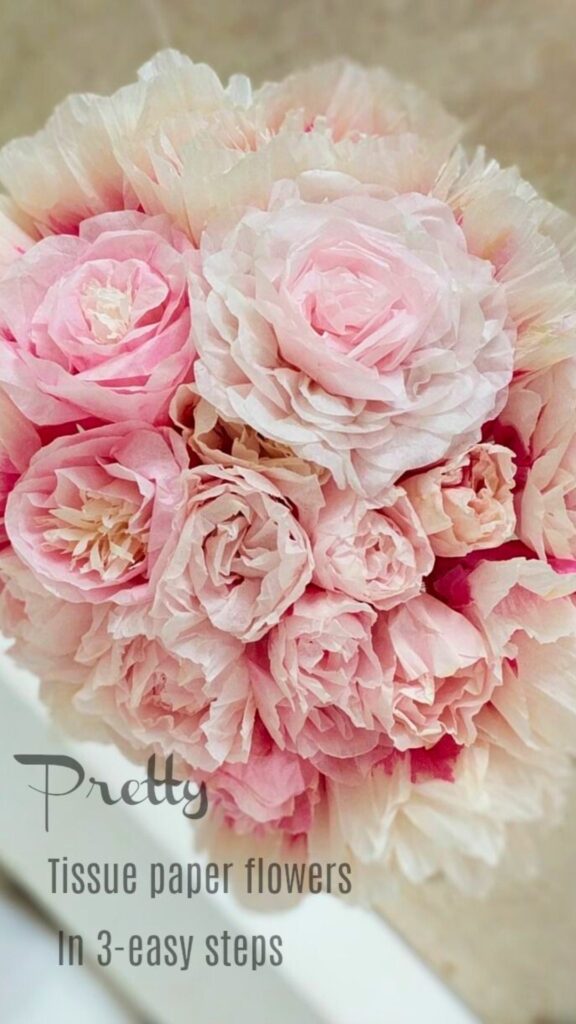
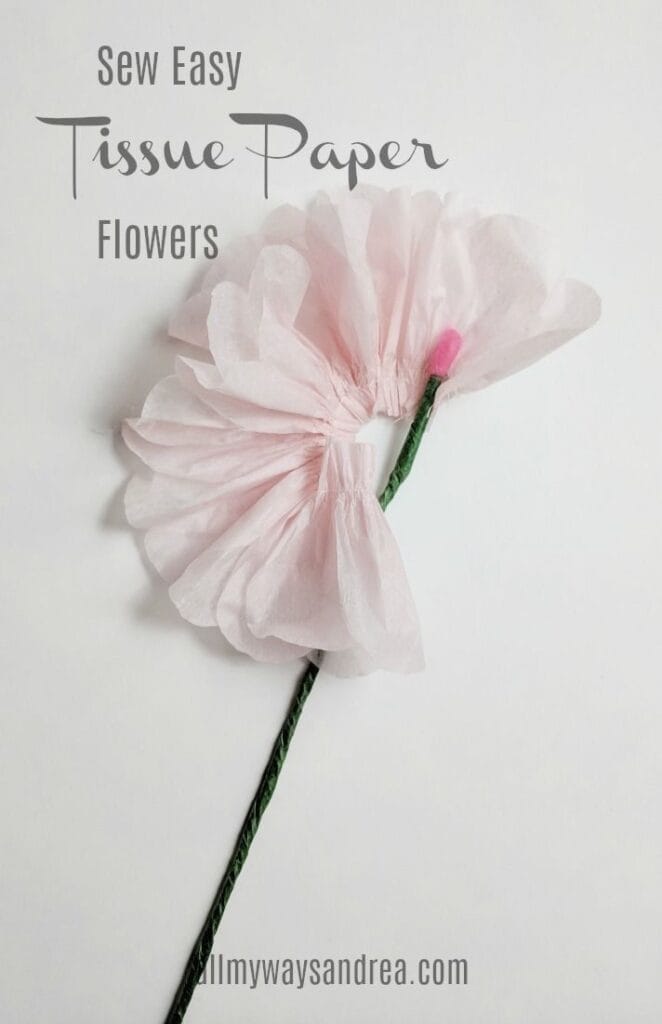
Easy Tissue Paper Flowers in 3 Steps
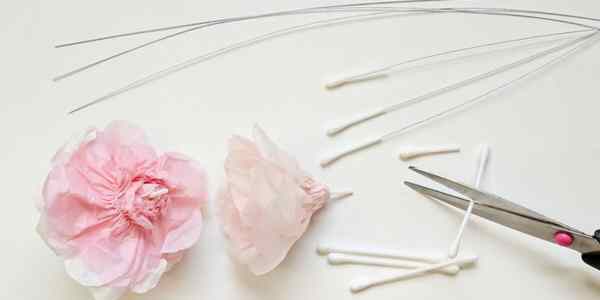
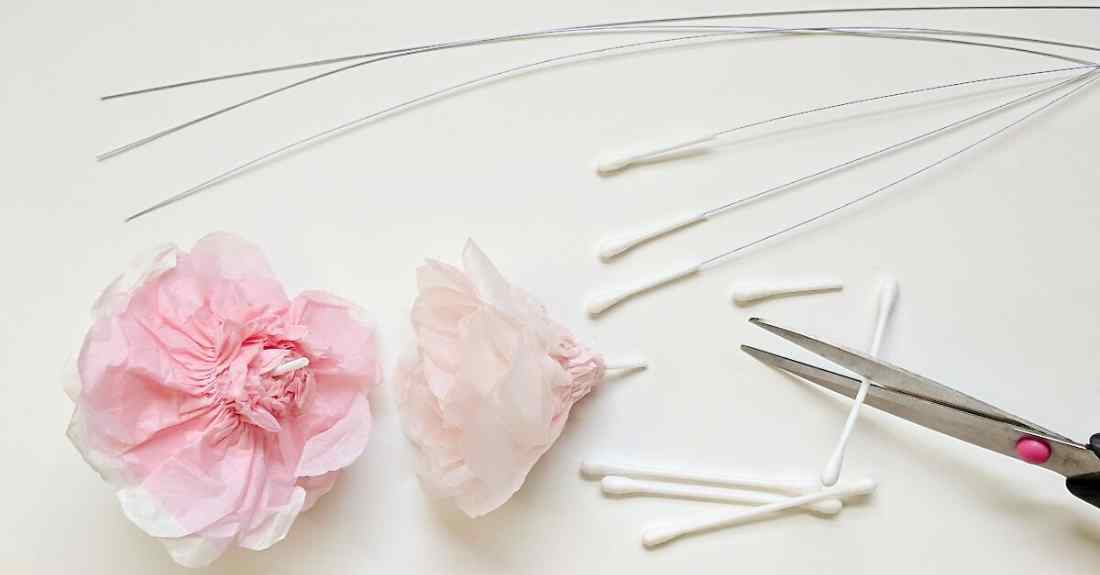
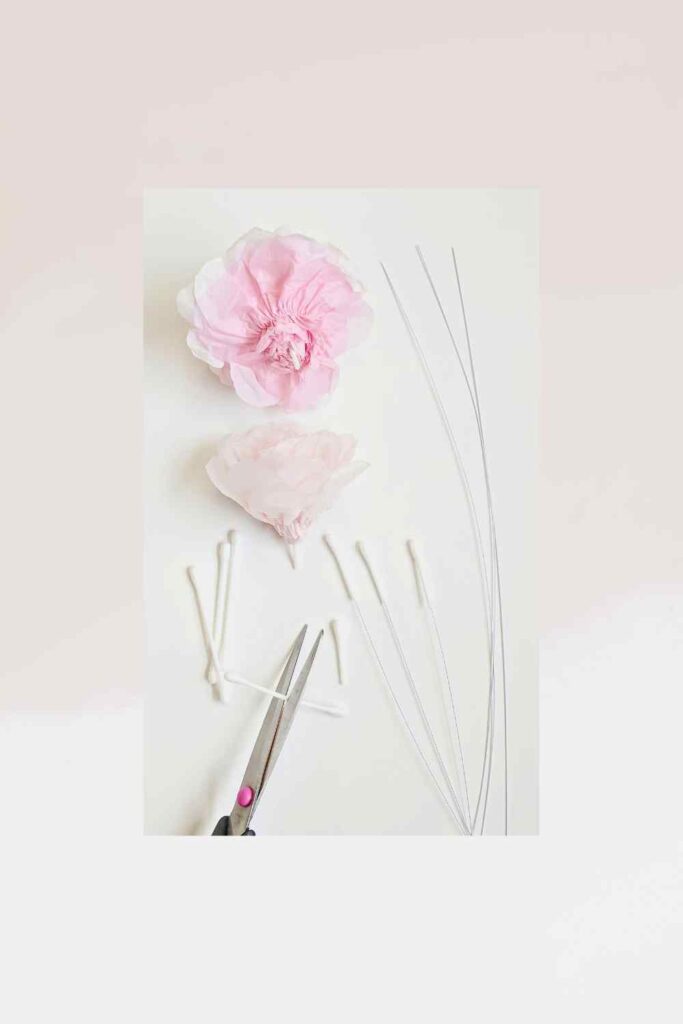
1. Apply a small amount of hot glue to one end of the wire stem or skewer. And attach it to the cut-off end of a hollow cotton swab; cover with tape.
2. Following, cut and arrange tissue strips in layers and gather using one of three methods.
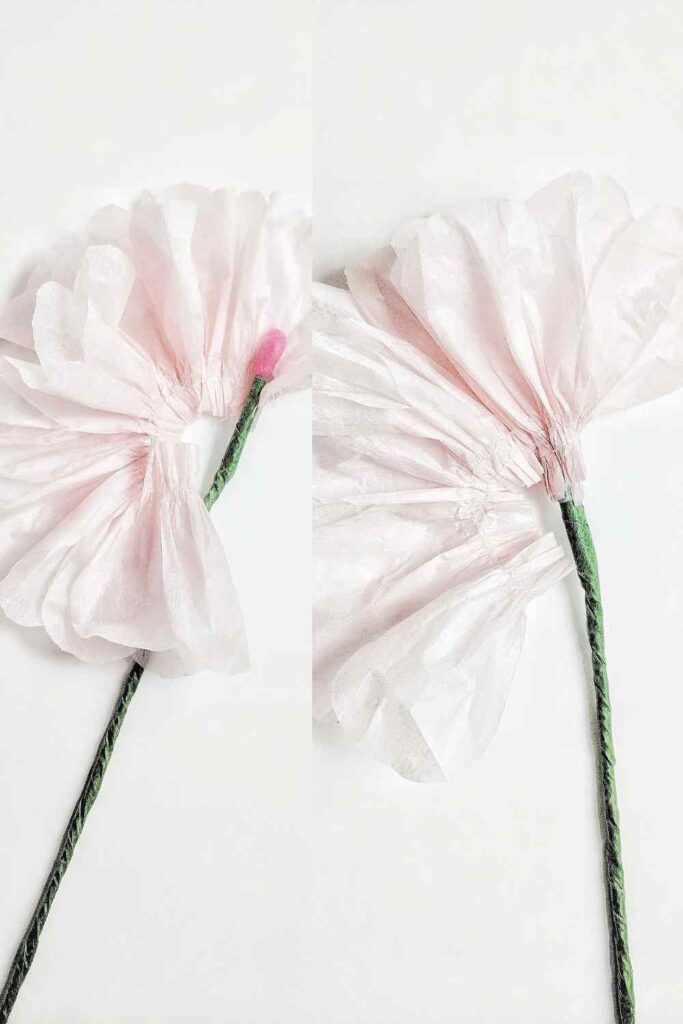
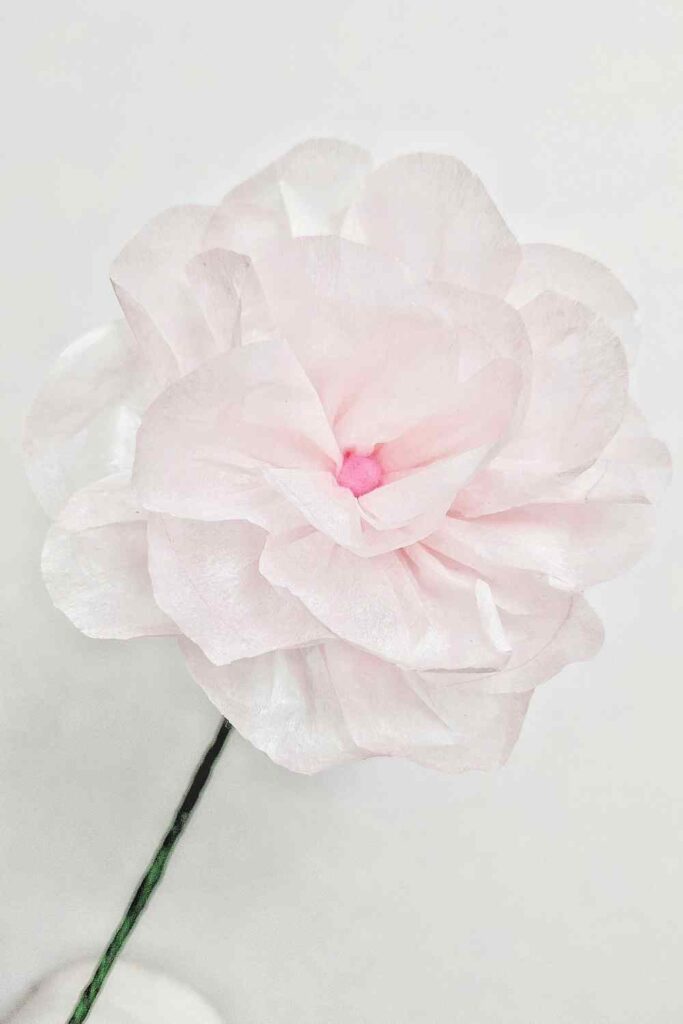
3. Wrap and glue gathered petals around bud/stem as shown in the image below at the left and right.
Stems for Paper Flowers – Get what You Want has a detailed tutorial on making and mounting petals and stems.
Attaching Petals
Tissue Paper Flowers – Make Linked Petals
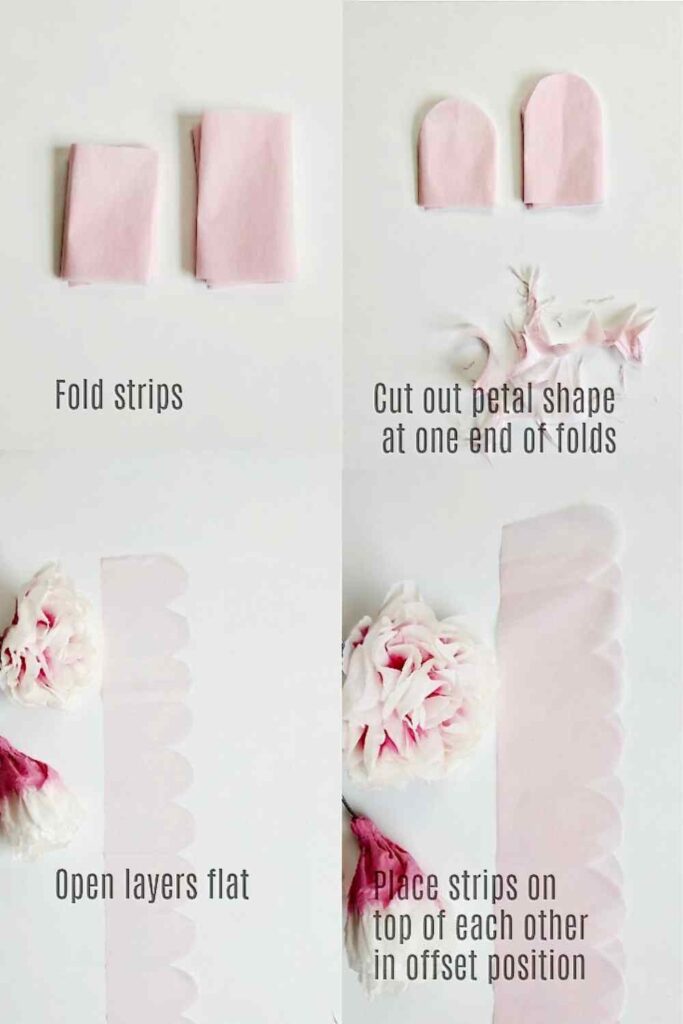
- Cut 2 strips of tissue paper 2 1/4-inches X 20-inches
- Again, fold the strips of tissue in half lengthwise – 2 layers
- Fold again in quarters – 4 layers
- Fold yet again in thirds – 12 layers
- Cut out petal shape at one end of the paper
Petal Gathering to Create Blooms of Beauty
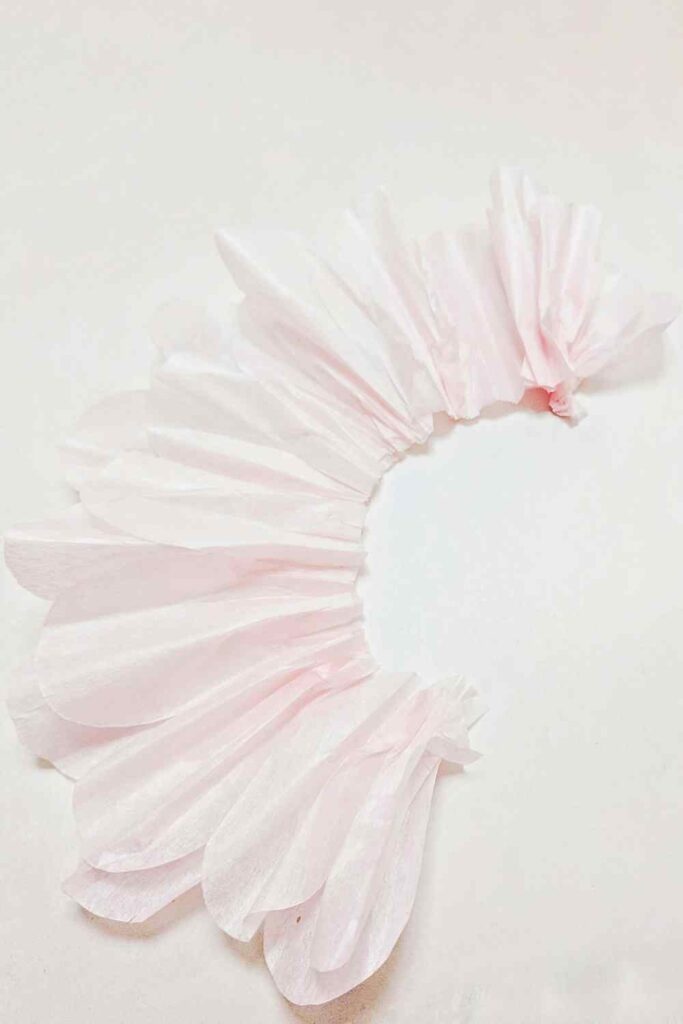
As shown in the images above and below, open layers and place one strip on top of the other in an offset position, the lower edge with your chosen method.
Use your fingers to gather both layers of tissue paper at the base of the lower edges. If you find finger-gathering difficult, use a needle and thread from any basic sewing kit.
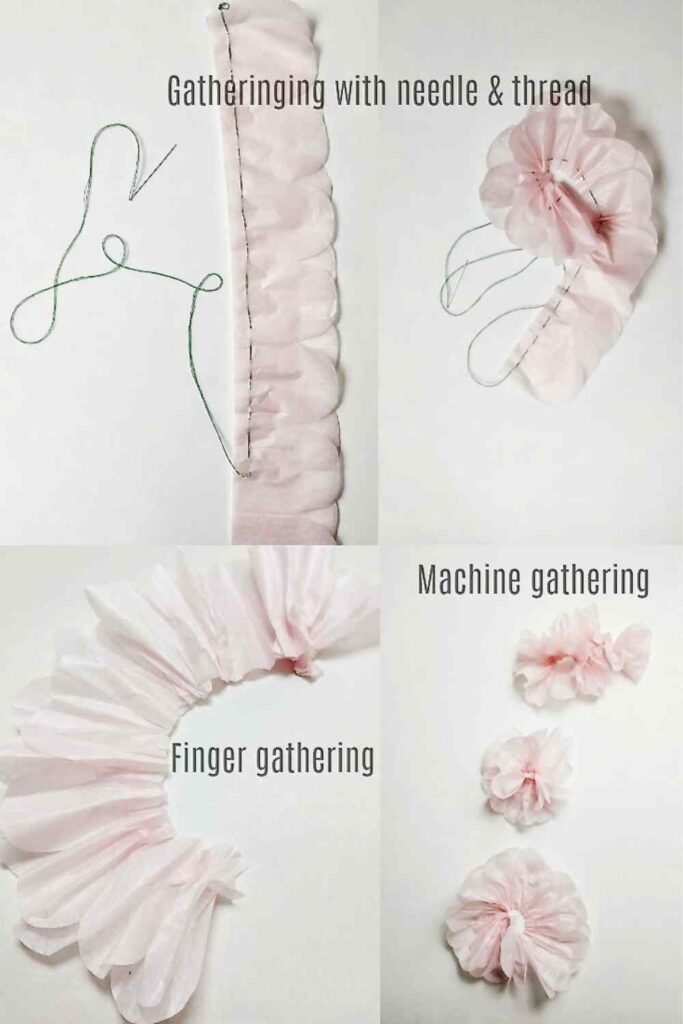
A running stitch is easy to do, and will help you gather your tissue the way you want. Be sure to use a sharp needle that wonʼt rip the paper and strong thread to avoid breakage. Tissue paper tears easily, use a gentle hand.
Besides, you may attach the ruffle foot to your sewing machine. Set it to the widest stitch and gather. In addition, you can use this idea to create a variety of flowers, switching papers as you wish.
Gathering Effects on Connected Tissue Petals – Resulting Flowers
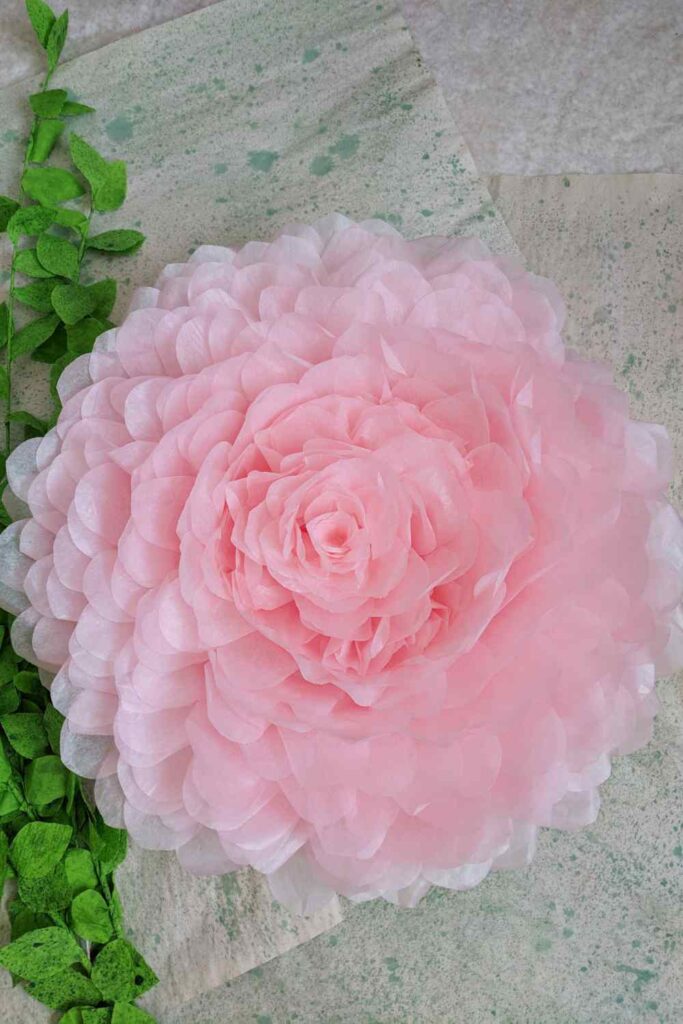
At the top of the image, the 40-inches long and 2 1/4-inches wide ruffle consists of double-layer strips with tight folds. The fullness of the gathers and the length of the tissue causes it to curl, and won’t lay flat. As a result, it will produce a flower resembling a carnation.
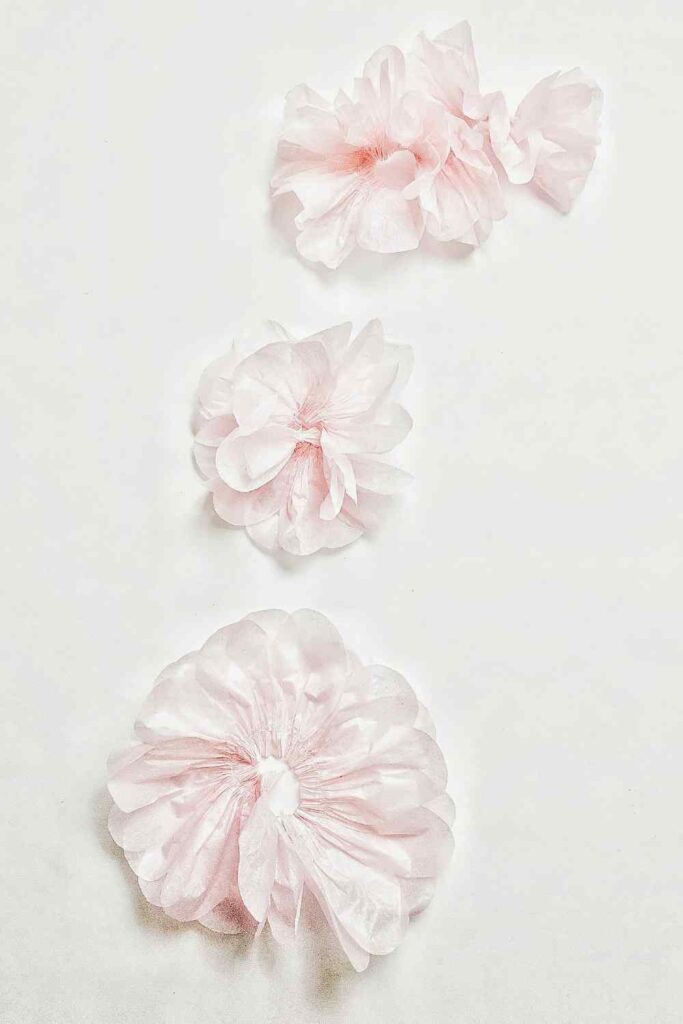
At the bottom, double-layered strips that are 3-inches wide and 20-inches long create a flower parallel to a rose.
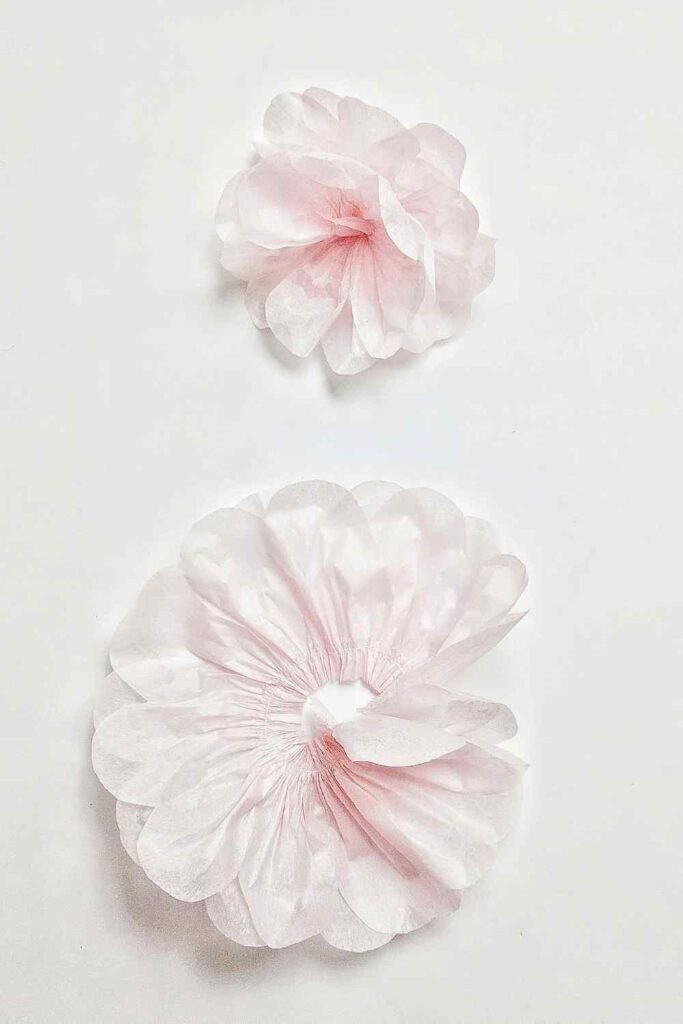
The petals in the middle are 20-inches long, 21/4-inches wide strips with two layers as well, but has fewer gathers. For that reason, will generate an open flower with a visible bud, as shown in the below image.
Notes
The above dimensions are suggestions. To achieve variation, explore, varying the sizes of papers, and fullness of gathers and folds. Record your findings in pictures and writing for later reference.
More About Petals
Longer petals with shallow cuts do not allow flowers to open and spread outward as the ones at the top and centre.
If you add more gathered strips of the same width, you will get a rose thatʼs wider in diameter.
Tight or loose rolling effects results, meaning petals with fewer gathers create a flower resembling an opening bud, and seldom are the centres of the blooms visible.
In contrast, full gathers generate open flowers rolled tightly or loose. Even so, they aren’t the only factors affecting a flower’s width and shape.
Tissue paper flowers with petals cut deeper and closer to the base, will open wider; shallow-cut petals won’t spread outward or fall in the same way, producing upright flowers.
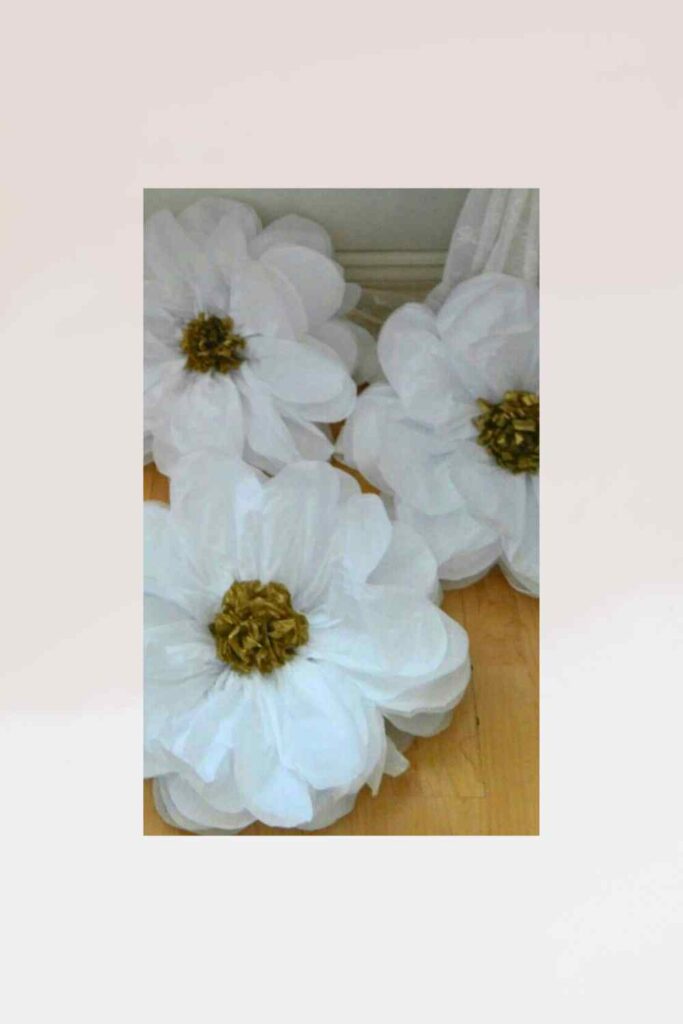
Gift Toppers
To use tissue paper flowers as gift toppers, attach them to ribbon with wire stems. Or try using adhesive on the packaging. Paper napkin flowers are a fitting substitute.
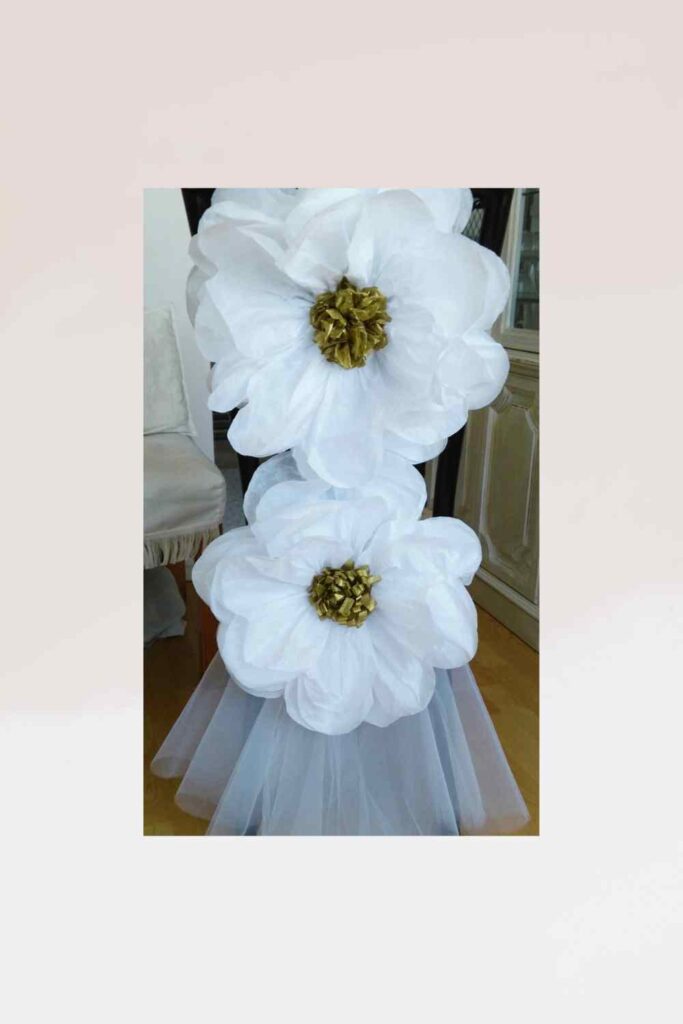
Larger Flowers
It’s possible to create considerably larger flowers using this technique. Only, you will need to set the petals on a separate base.
I hope you found some ideas that you can incorporate into your everyday craft life. Who knows, maybe you want to help out a friend with upcoming event decorations.
Whatever the occasion, may you go past making tissue paper flowers, and start turning out unexpected and dazzling paper flower delights.
Glossary
Gauge is used to measure the size or thickness of the wire. Higher numbers signify smaller softer wires; while lower numbers represent stronger sturdier wire.
A running stitch is a line of small even stitches that goes in under the fabric or paper and comes out above. Try stitches about 3/8-inch wide. If some stitches are uneven, don’t sweat it. It won’t matter in the end.
I’m headed back to my creative space to make DIY vases from paper.
Thank you for stopping by and taking the time to read.
Until the next time, if the Lord wills, see you next time.