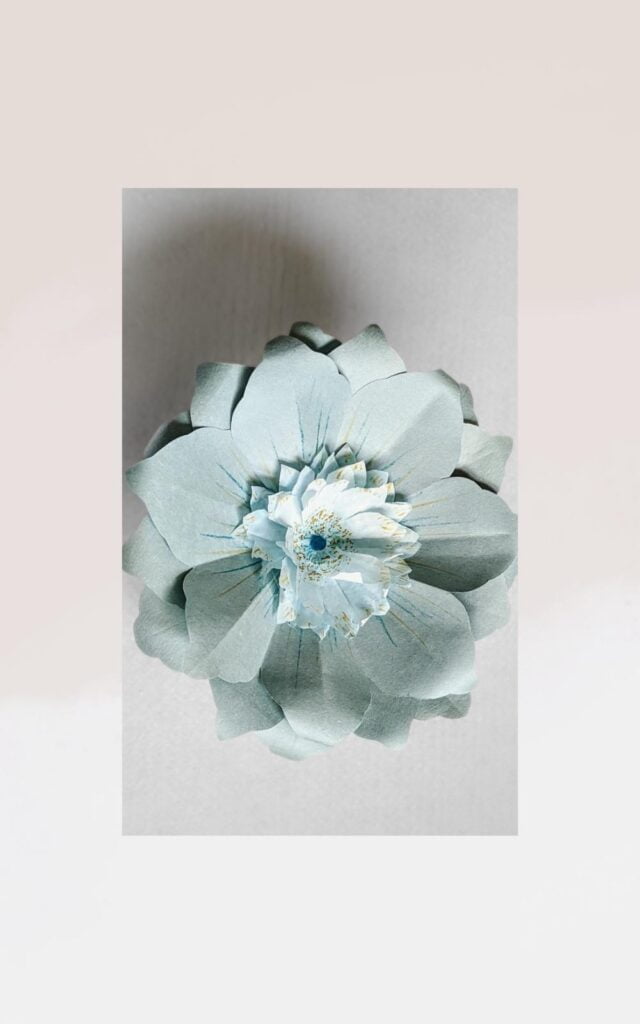
Make Beautiful Construction Paper Flowers in a Cinch
Construction paper flowers have risen in the splendid paper blooms revival, and making a bunch couldn’t be easier. It’s a glorious way to add vibrant colour to your craft projects without imposing on your space.
Below, you’ll find step-by-step instructions to help you make a variety of blooms. Learn how to use varied petal shapes and paper centres to design clusters of flowers, creating fresh flower-making ideas of your own.
How to Make Construction Paper Flowers
Supplies
- Construction paper, napkins, and other varieties
- Glue sticks, and white glue
- Craft paint, food colouring, markers, crayons
- Wire or wooden skewers for stems
- Coffee filters, cupcake liners, floral tape or paper to make stem coverings
- Cotton swabs, glitter or other styles of pompoms, buttons, etc.
- Small purchased flowers (optional) or design centres of your own.
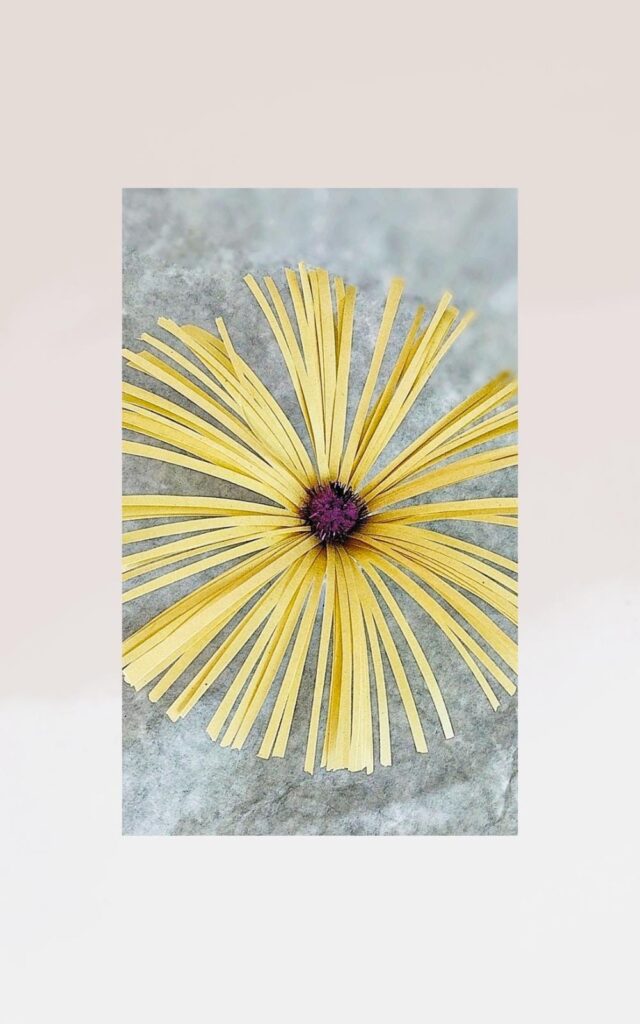
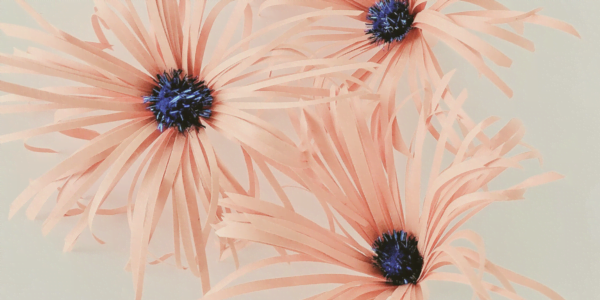
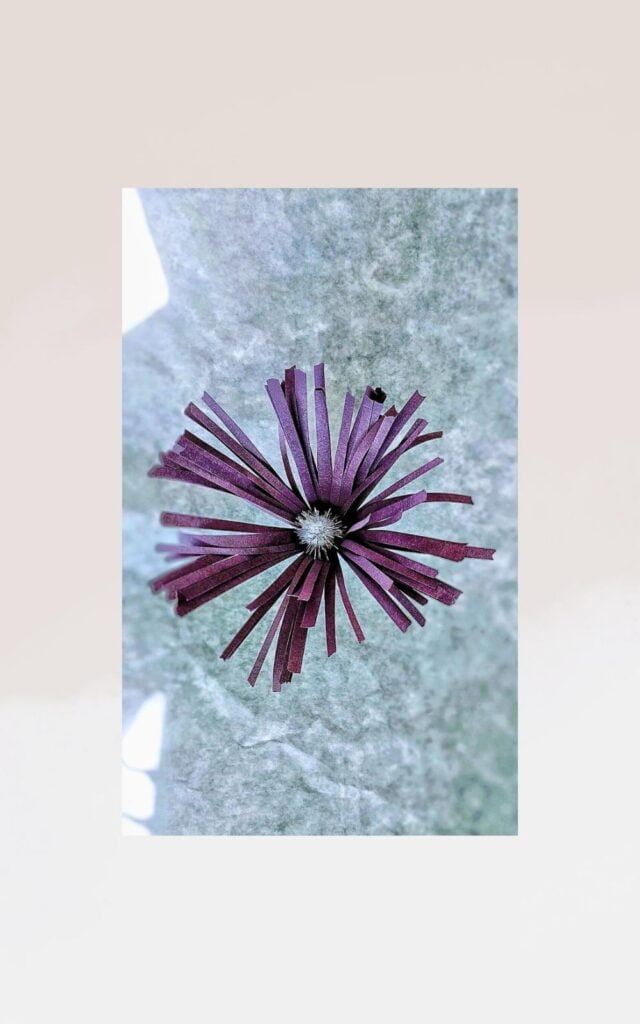
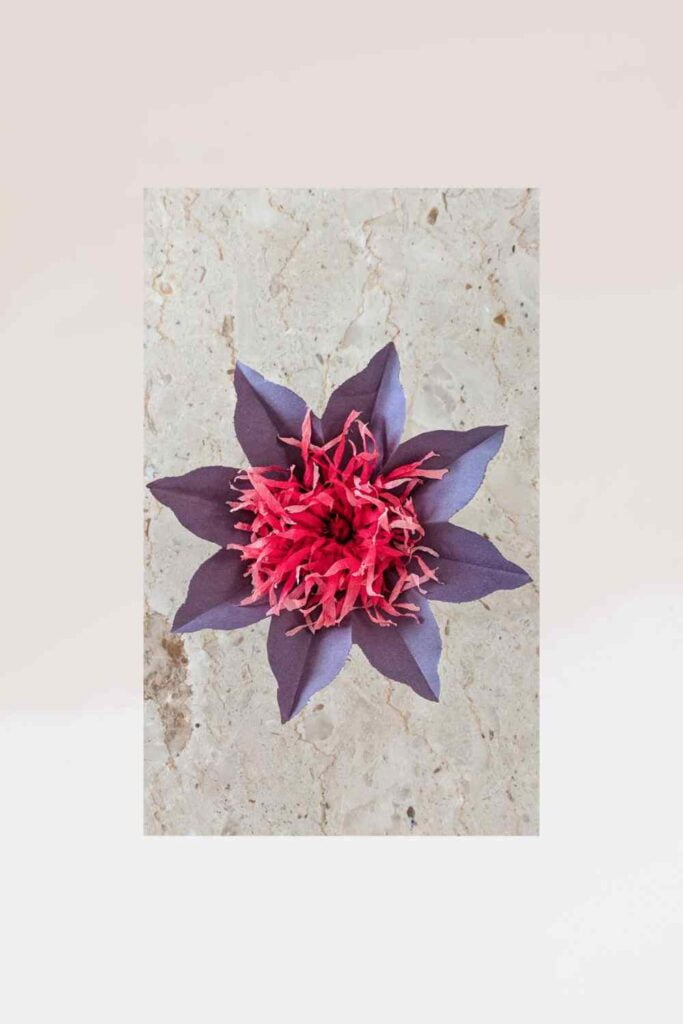
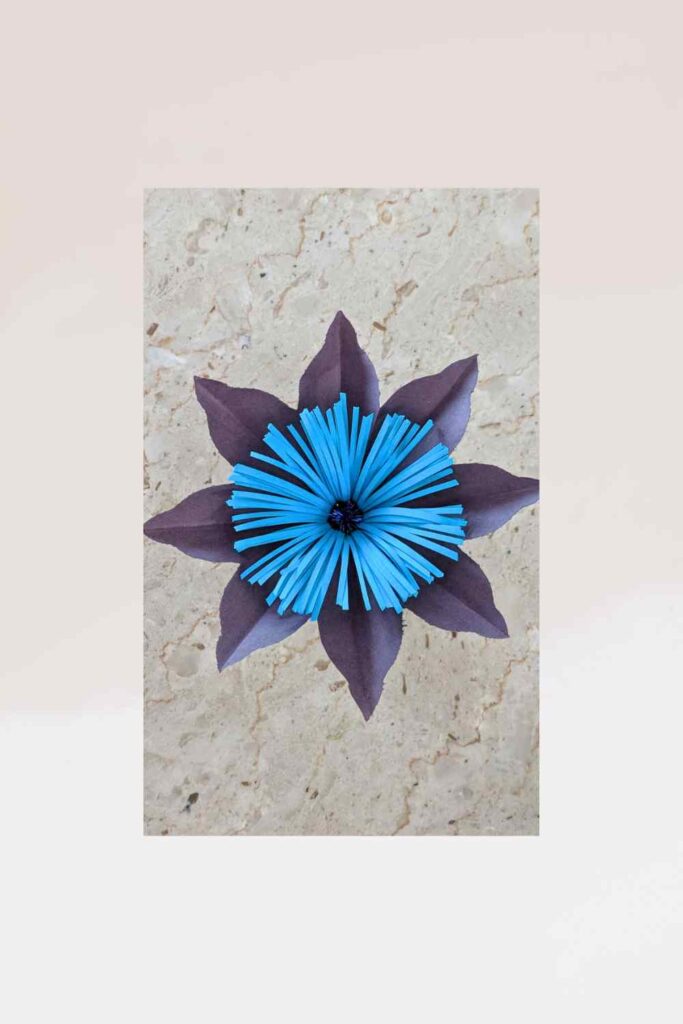
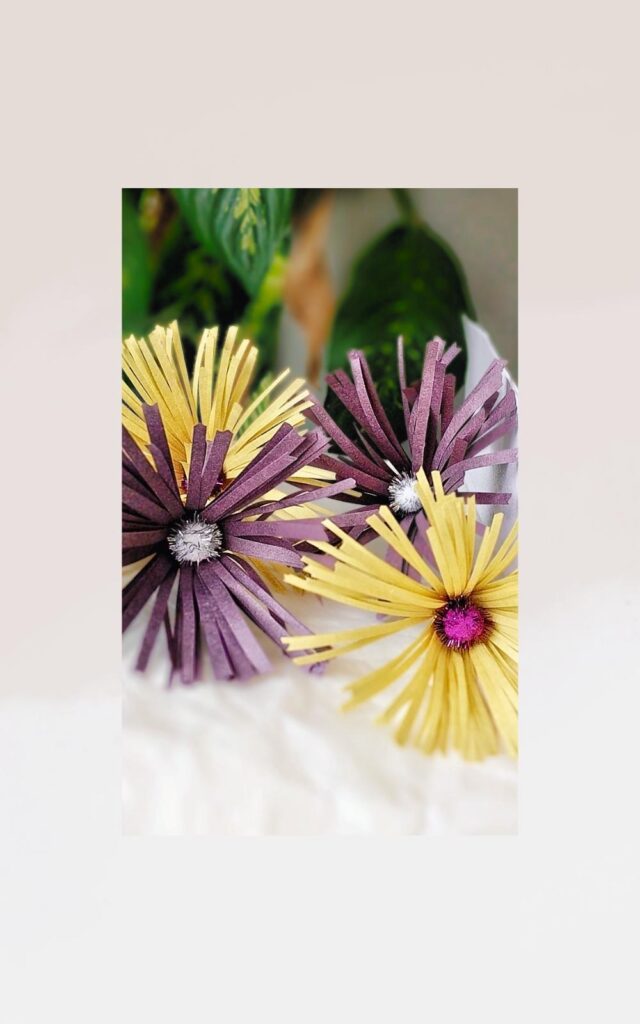
Fringed flowers produce a versatile base for creating variety throughout your paper floristry.
Supplies and Tools
- Glue gun
- Scissors
- Markers, pencil, crayons
- Ruler or straight edge
You do not need every item listed to make your flowers. View the surplus as suggestions, offering a quick means for variety in your displays.
Instructions
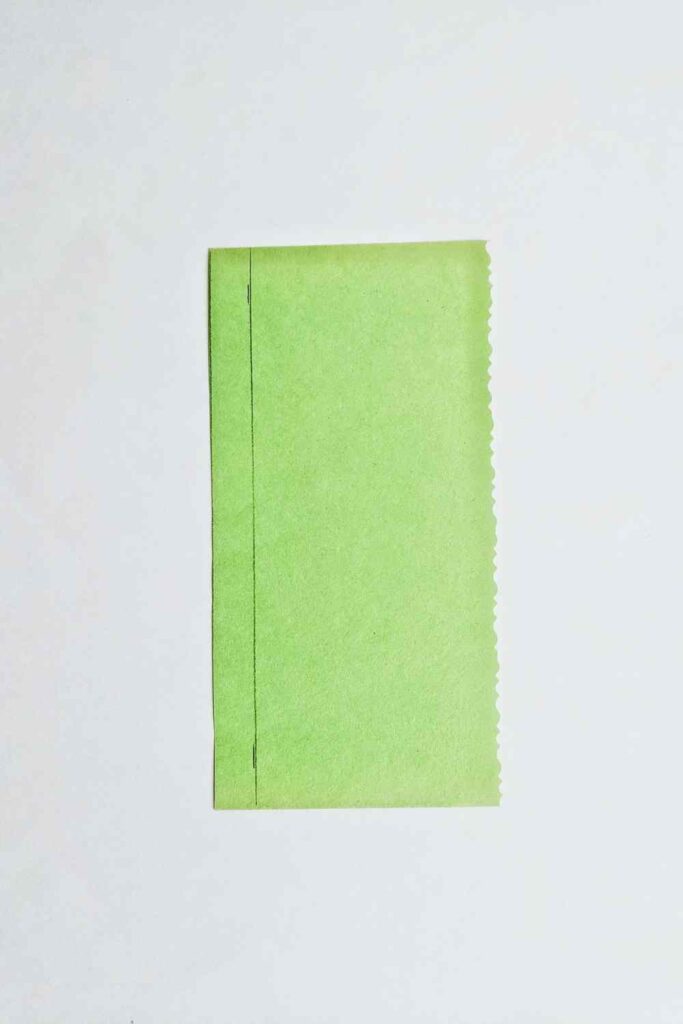
1. Cut and Mark a Line
Cut a rectangle of paper; use a ruler and a pencil to mark a line 1/2 inch up from the bottom edge. I used 9 x 4 1/2 inches pieces of construction paper.
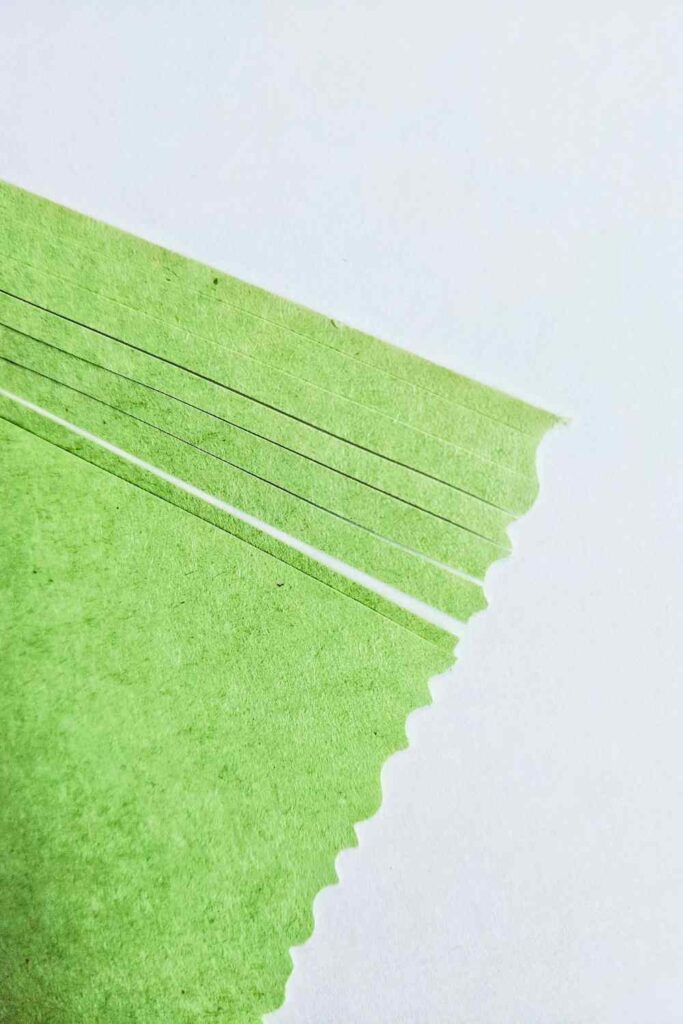
2. Fringe the Rectangle in its Entirety
Use scissors to cut narrow strips to not through the marked line, and continue cutting until you have finished fringing the entire rectangle. Another choice is you may draw lines and use a craft knife and cutting mat to slash paper.
Note Try using edge scissors if you have them on hand. They alter outlines and make a remarkable variance. In addition, you can use the flowers as gift toppers, choosing to keep or drop stems. The latter offers quicker results.
3. Attach Stem to Fringe/Petals
Apply a small spot of hot glue at the lower edge, place the stem onto the glue and roll it. Use caution when using a hot glue gun.
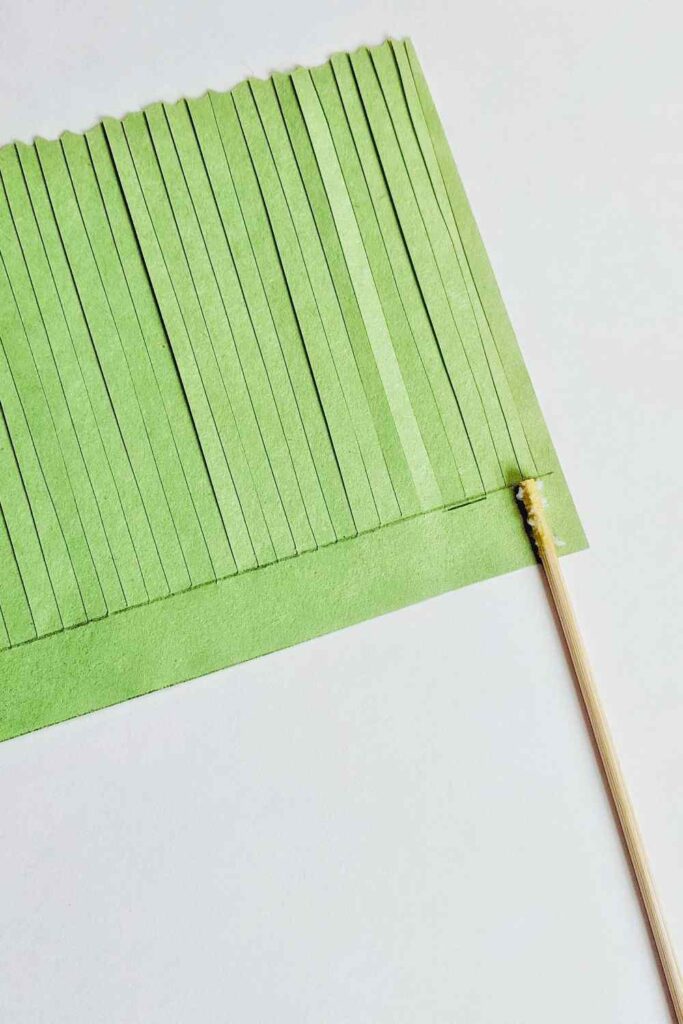
4. Roll Paper Onto Stem
Continue rolling and putting small spots of adhesive on the paper until you reach the end of the fringed strip. You’ll find glue sticks and white glue aren’t as effective in fastening your crafted petals to wire and bamboo unless you’re using stems wrapped with suitable materials.
Hot glue bonds keep a firm hold on paper, and it’s why I stick to the glue gun, but you only need it to secure the stem. Regular glue stick work for bonding paper to paper in most cases.

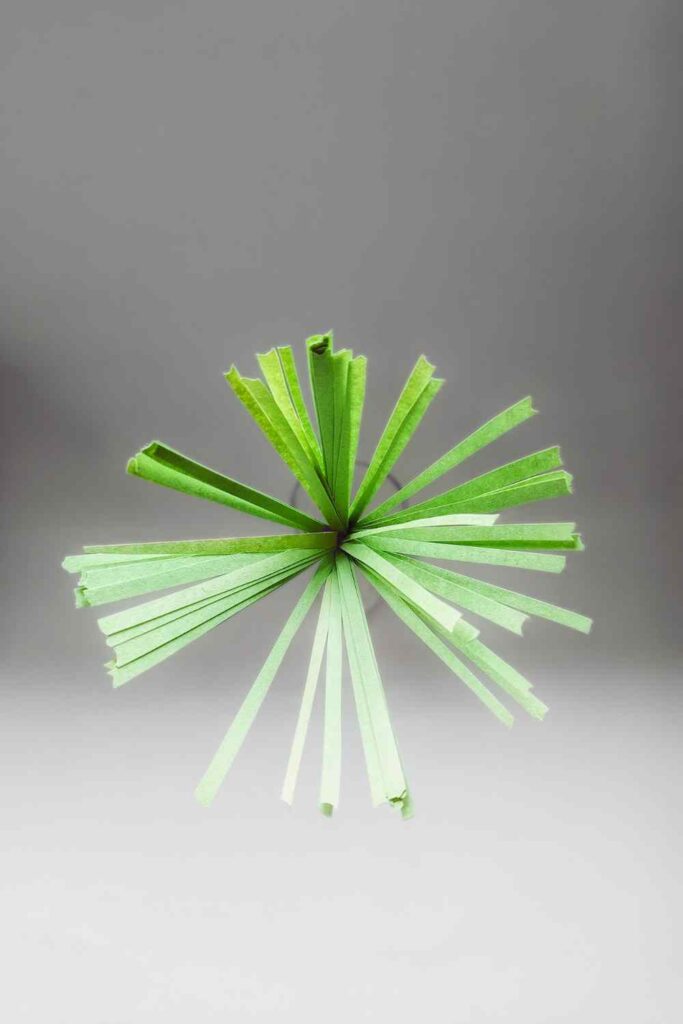
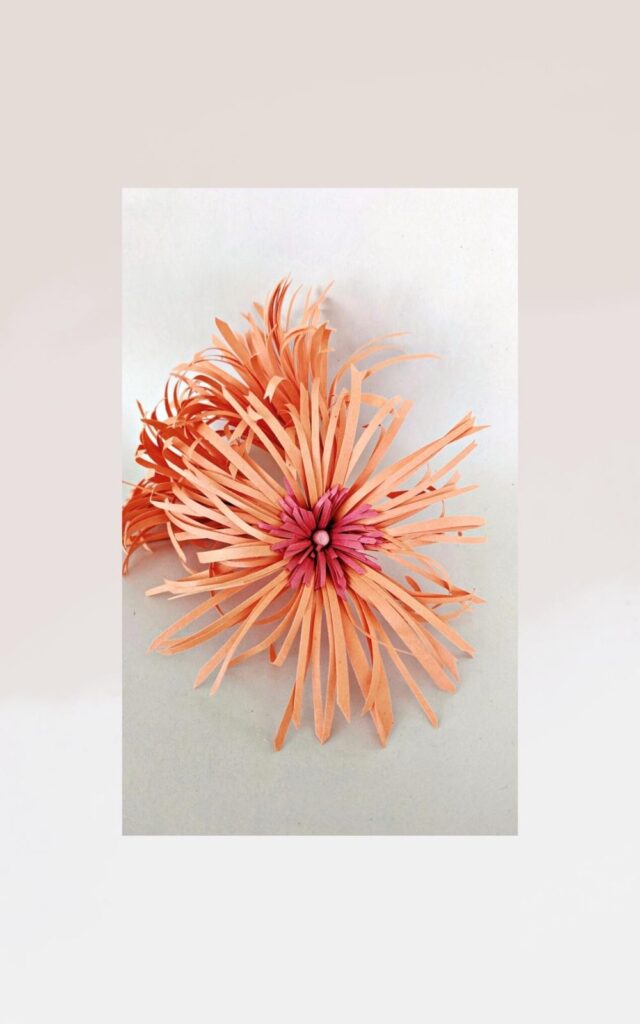
5. Curl and Adjust Petals
Curl and adjust the petals as desired. Apply a small volume of glue in the middle of the flower, covering it with a chosen centre. Use hot glue if centres include materials besides paper.
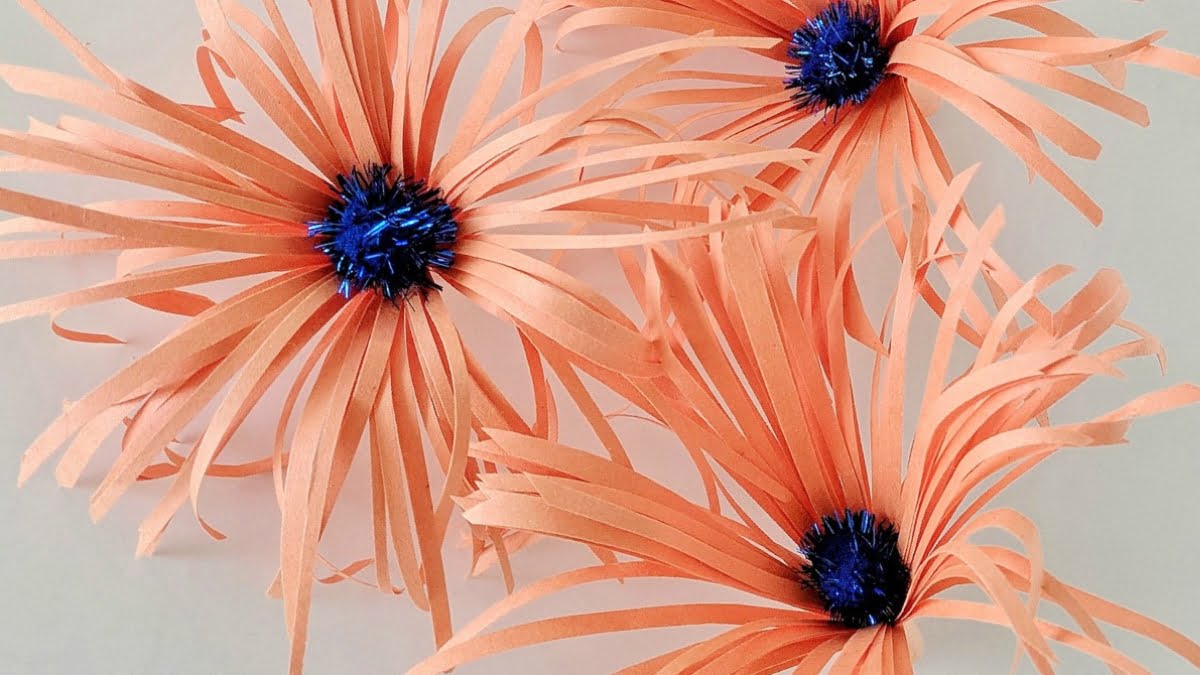
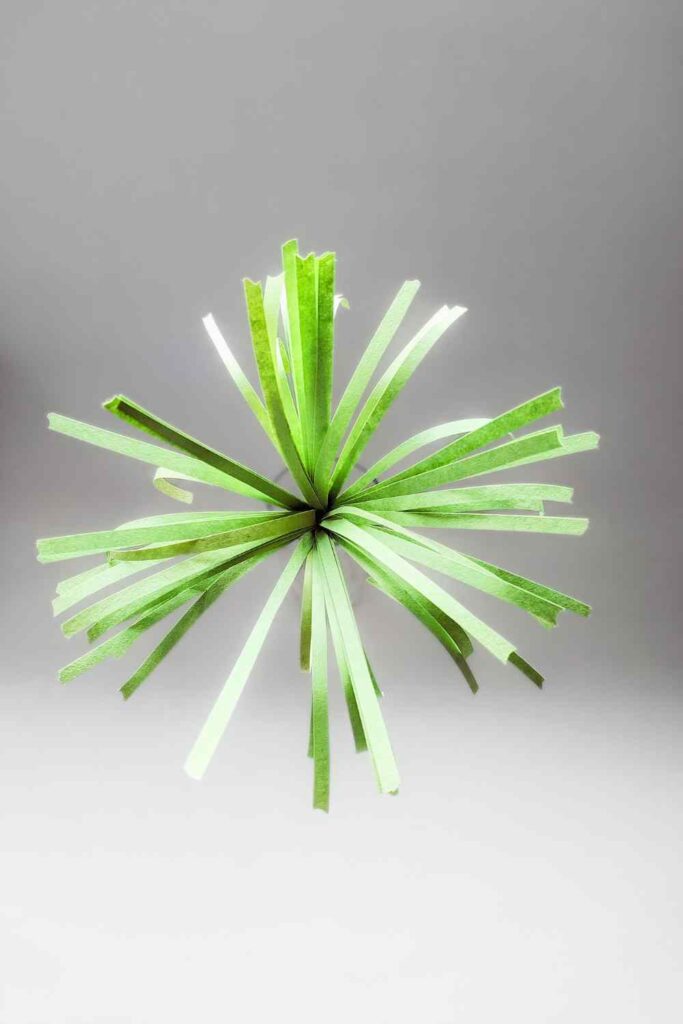
Fringed flowers produce a versatile base for creating variety throughout your paper floristry. Make them in smaller sizes and use them as centres for sizeable blooms.
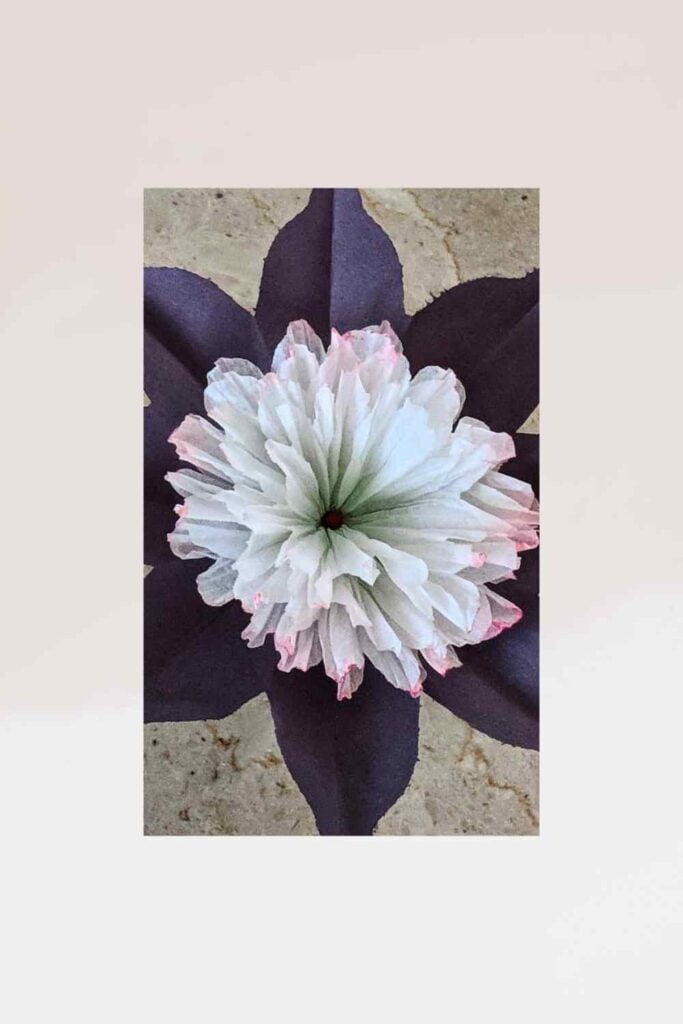
Besides, added fringe petals will produce flowers resembling zinnias and asters, and stretching the petals along the stems creates another variety.
Cover stems: (a) Stretch a piece of the floral tape, (b) hold the flower in one hand, (c) keep the tape at an angle in the other. Covering the raw edges of the petals at the base, twisting the wire or skewer until you enclose the whole stem. You don’t have to stop there; highlight coffee filter flowers or other varieties with them as you wish.
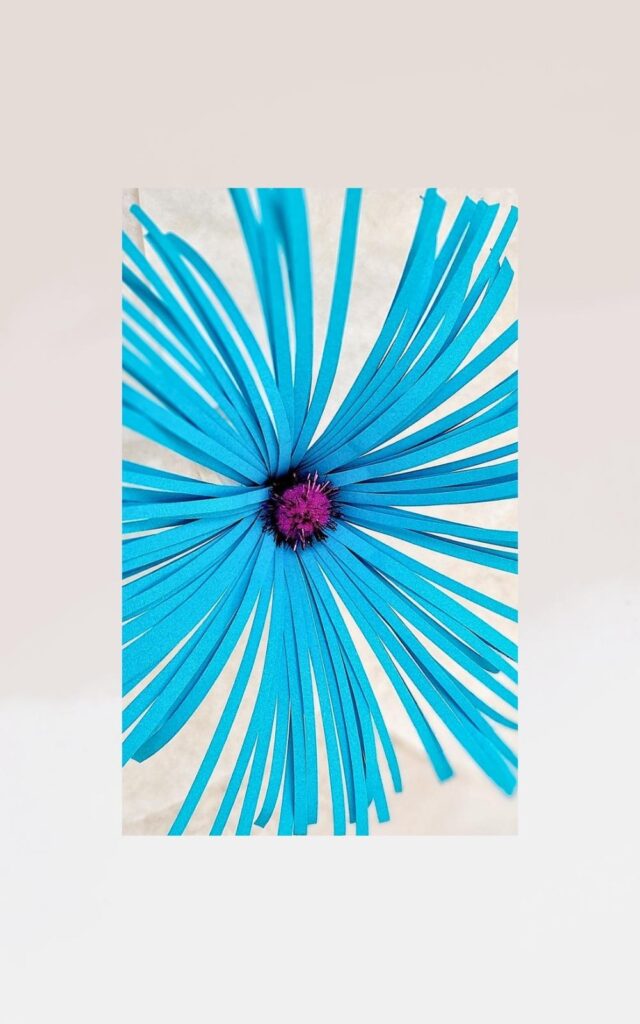
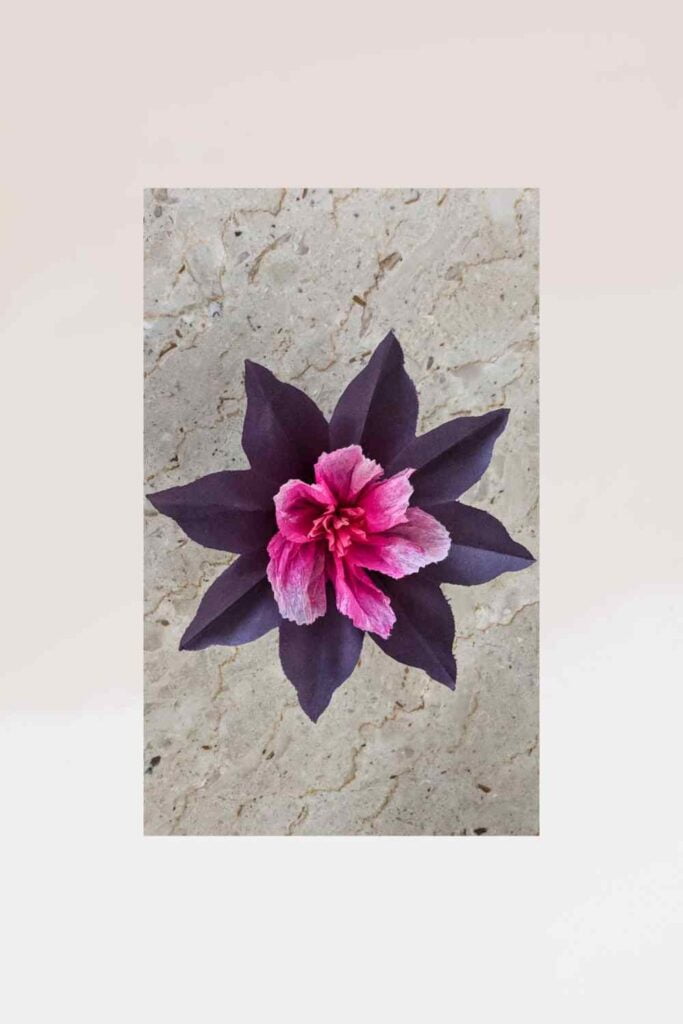
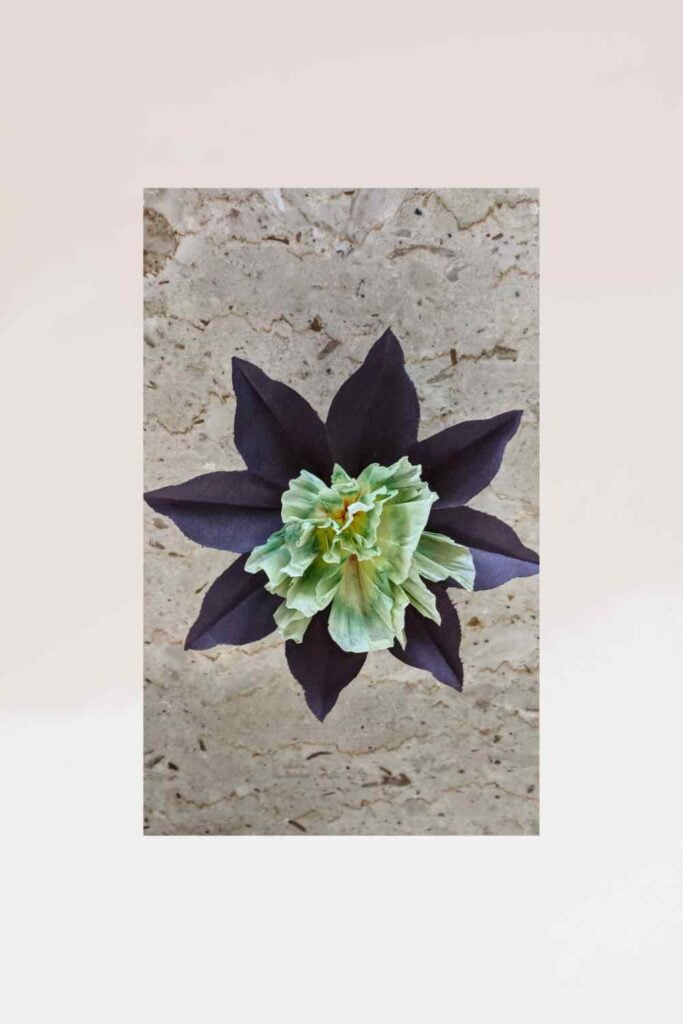
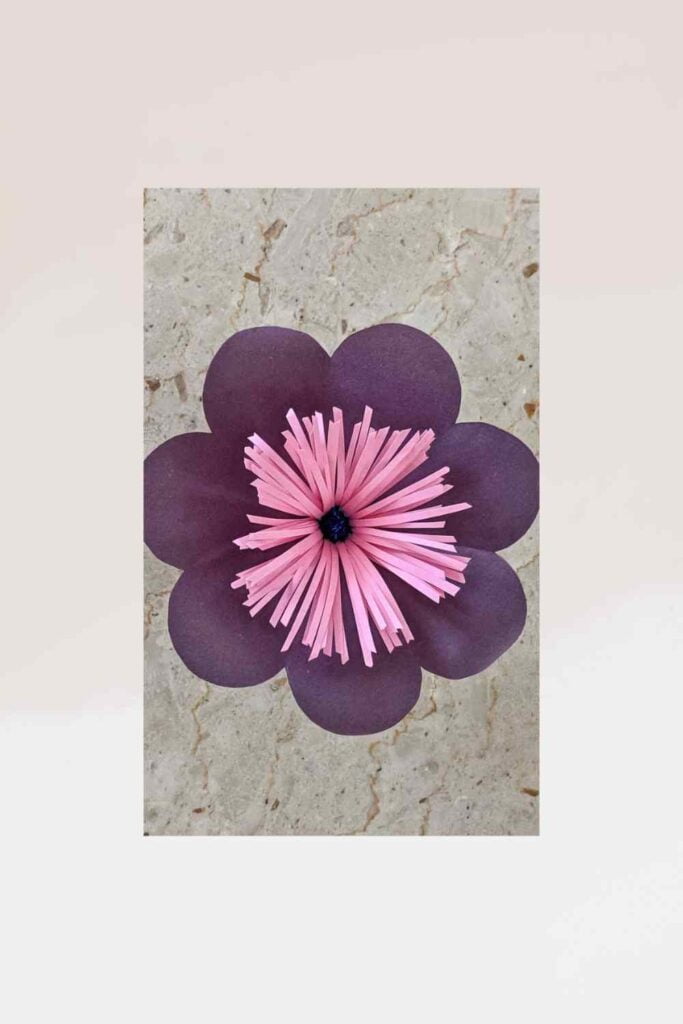
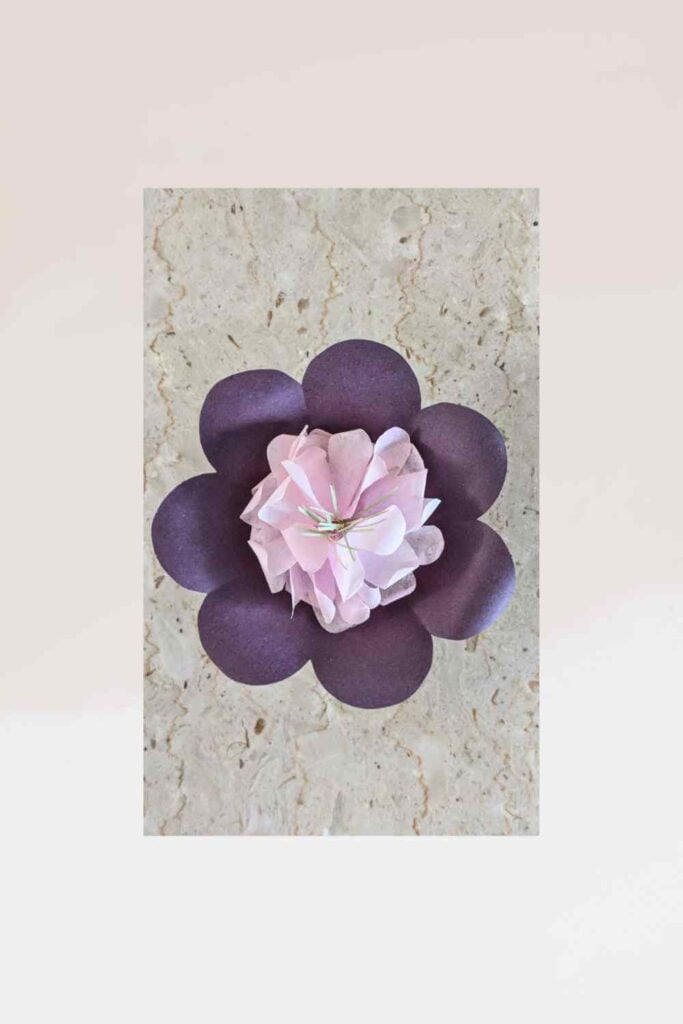
You’ll get added variety by attaching various centres in the middle of the flowers, as shown in the below gallery. Remember, you don’t have to use a centre, and you may add more petals or fringe in a tight roll, eliminating the hollow in the middle. If you aren’t making a composite flower, cover the stems to finish.
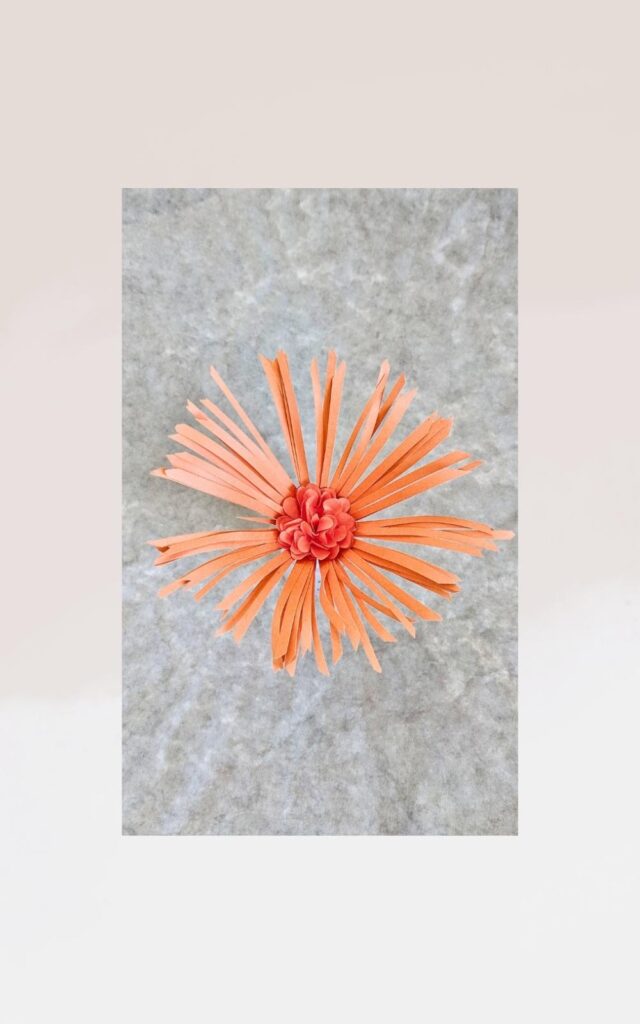
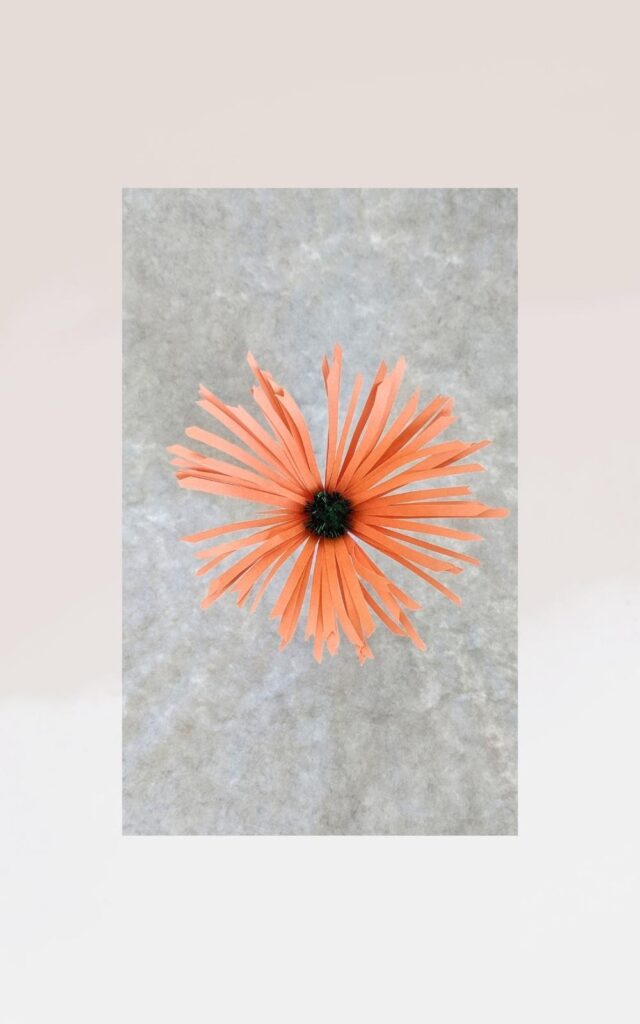
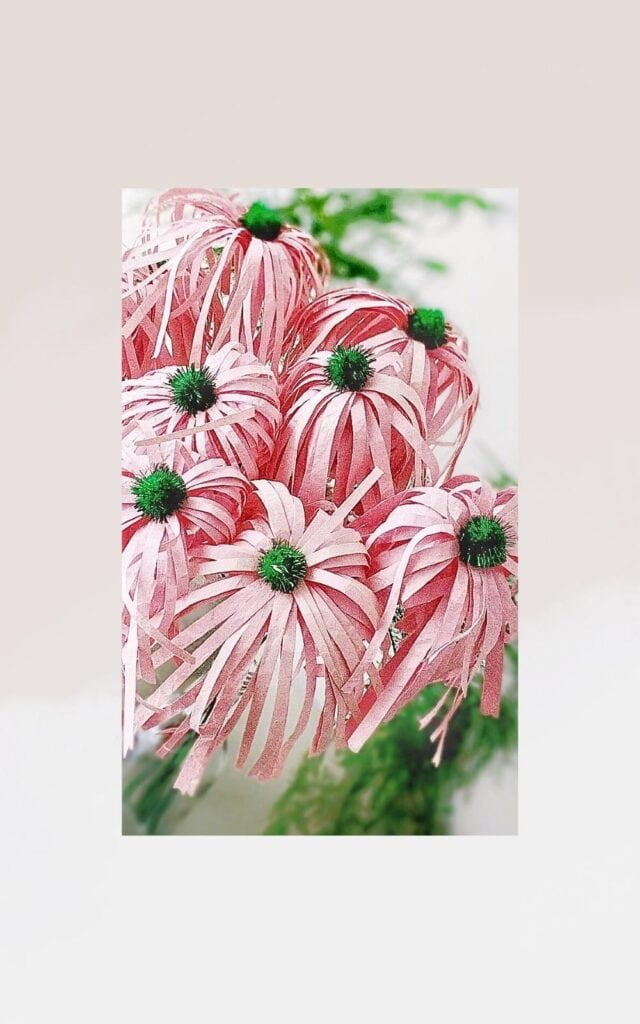
Fringed Zinnia-Style Blooms
Zinnia and aster-style blooms are fast flowers, used alone or as centres in sizeable varieties. See the instructions in the below gallery. Another way is to draw lines and use a craft knife and cutting mat to slash the paper.
Accenting Construction Paper Flowers
Pictures in this post are for inspiration to stir you to creativity. Many featured flowers are large paper fringes on stems in their simplest form. Use the idea and noted construction methods to create masses of blooms in varied sizes for your needs.
You can engage in countless paper floristry projects with glue and a few simple supplies. Flowers, lanterns, collages, book covers, backdrops, cards, cutouts, and drawings are but a start.
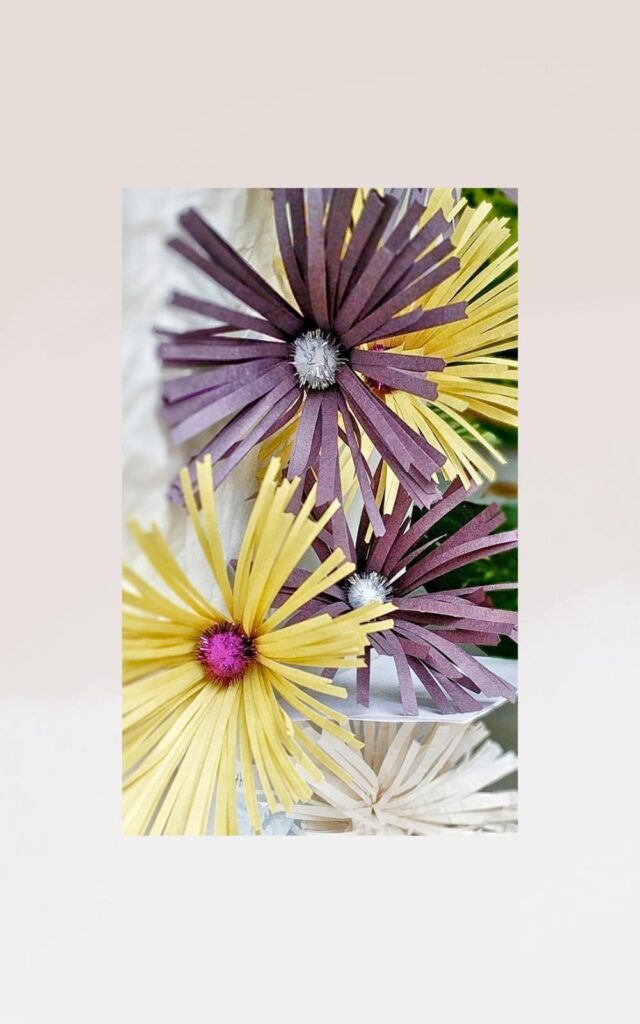
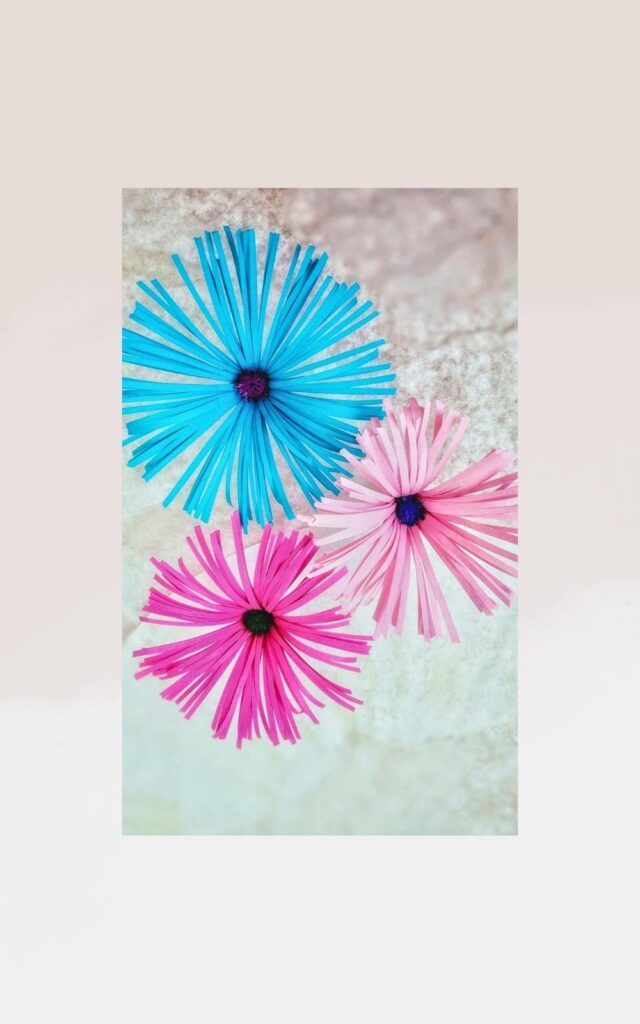
Create a Garden of Colour with Construction Paper Flowers
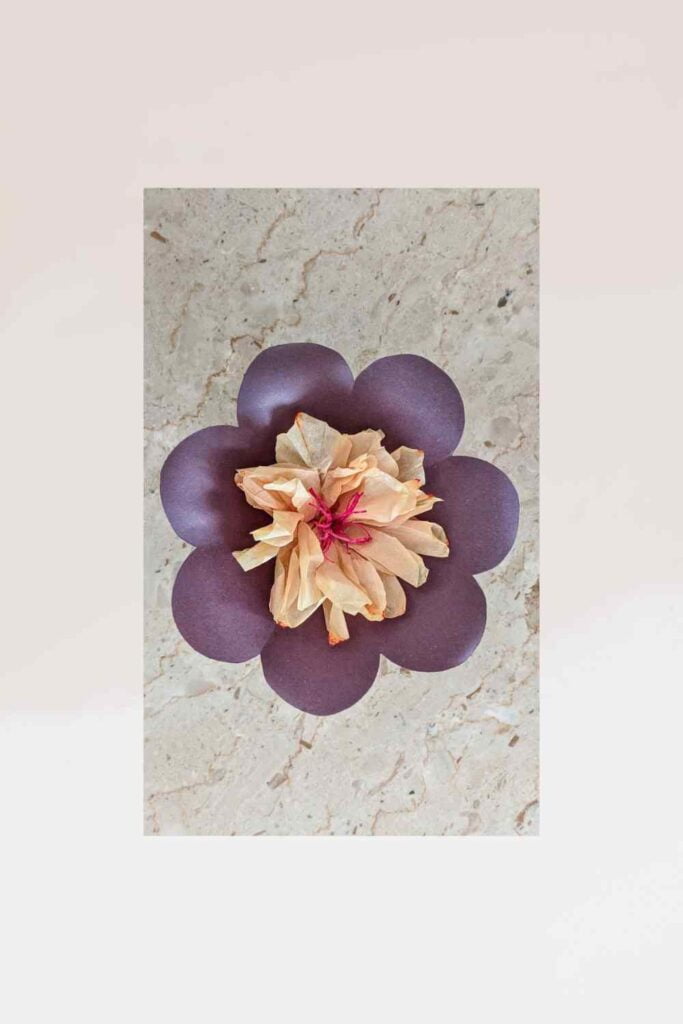
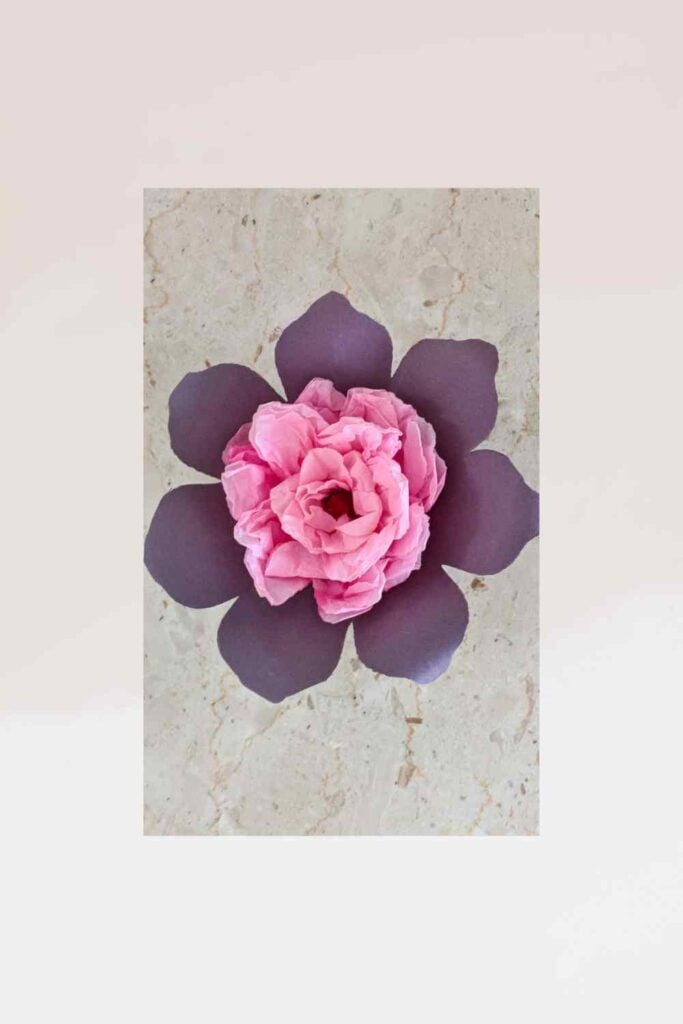
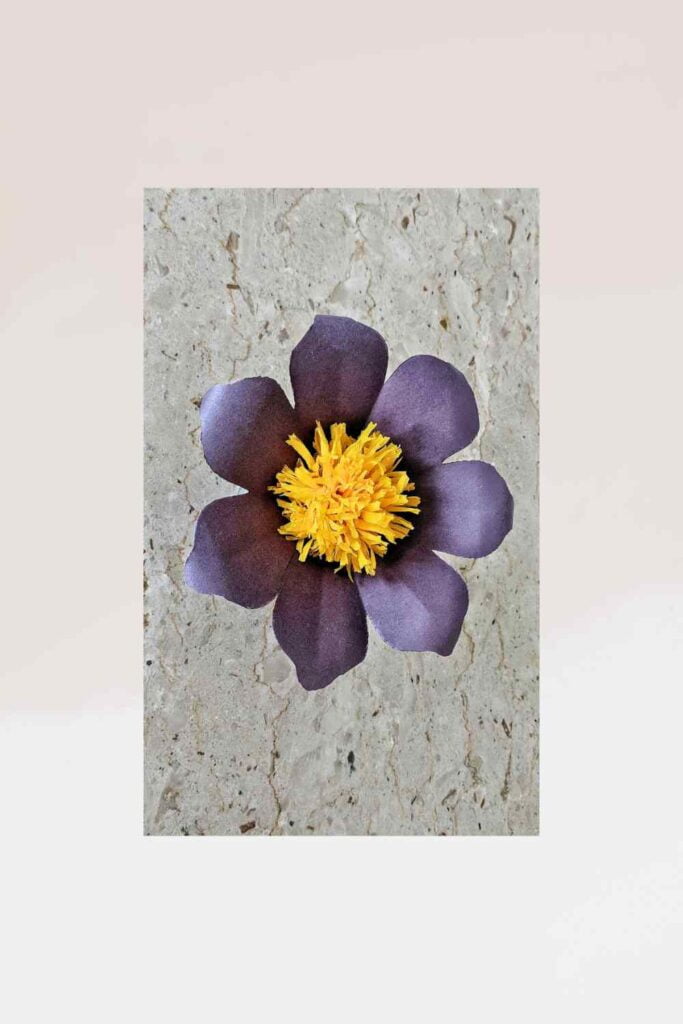
The flower centres in the images below expands on the above construction paper flowers.
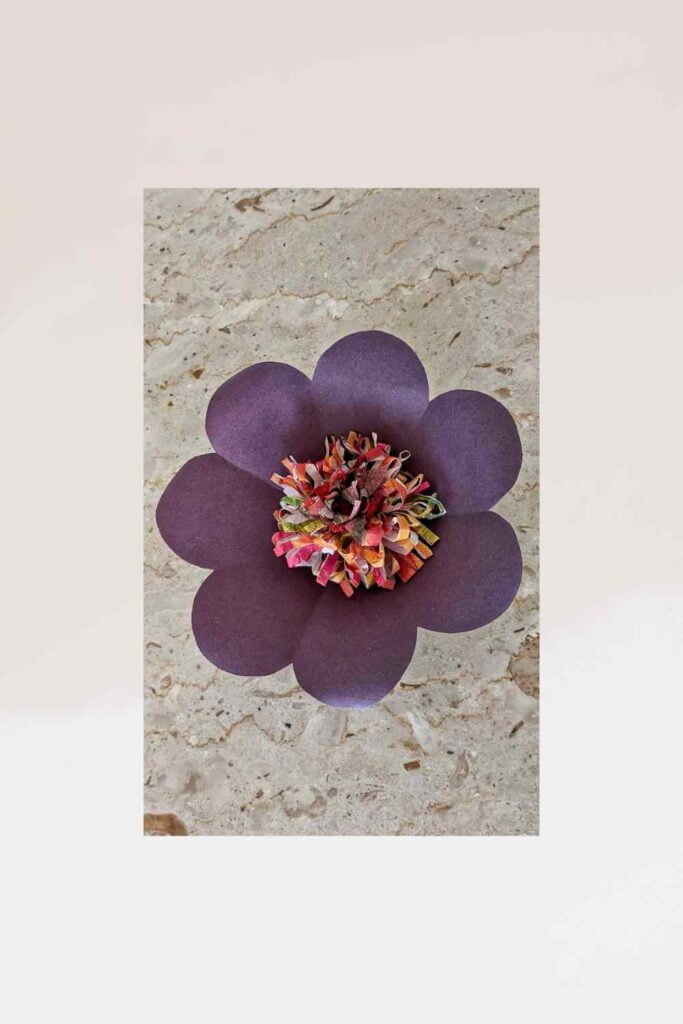
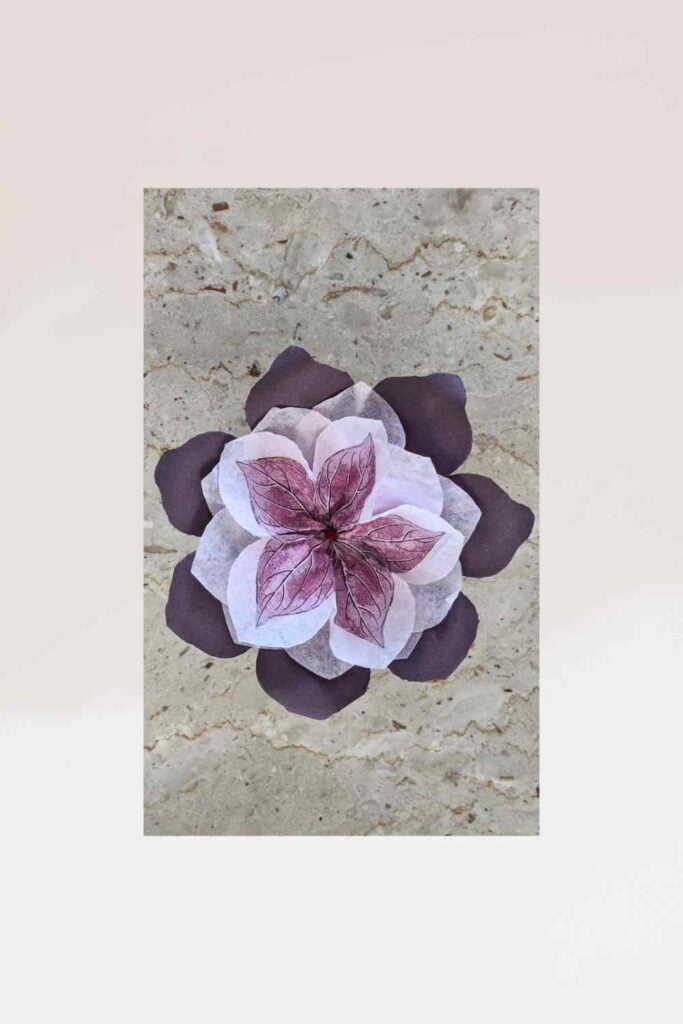
Paper Flowers with Connected Base Petals
Instructions
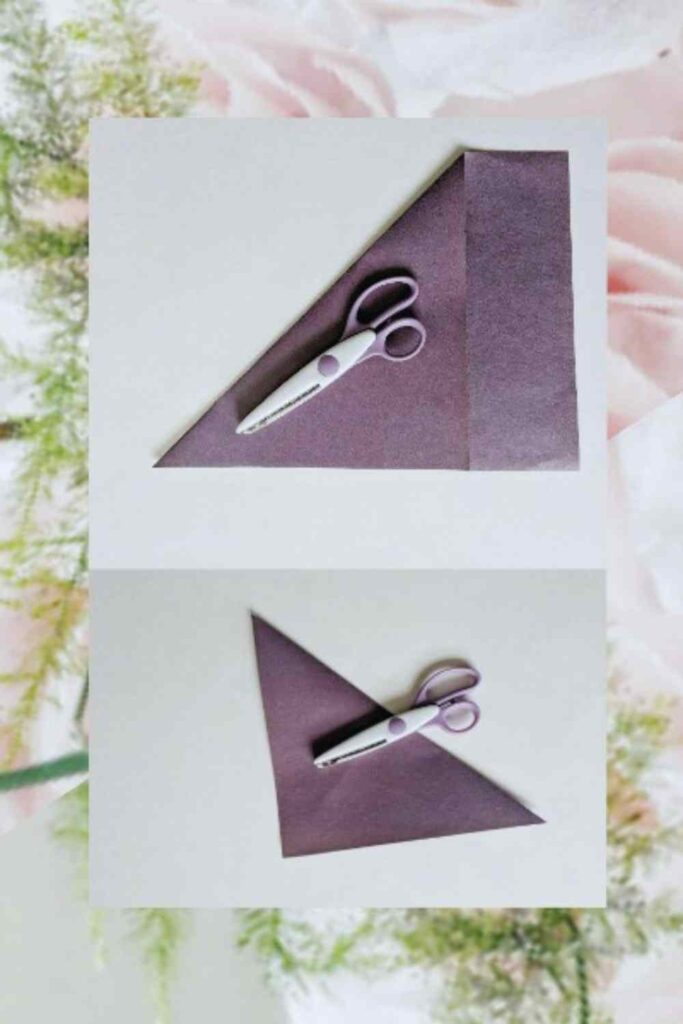
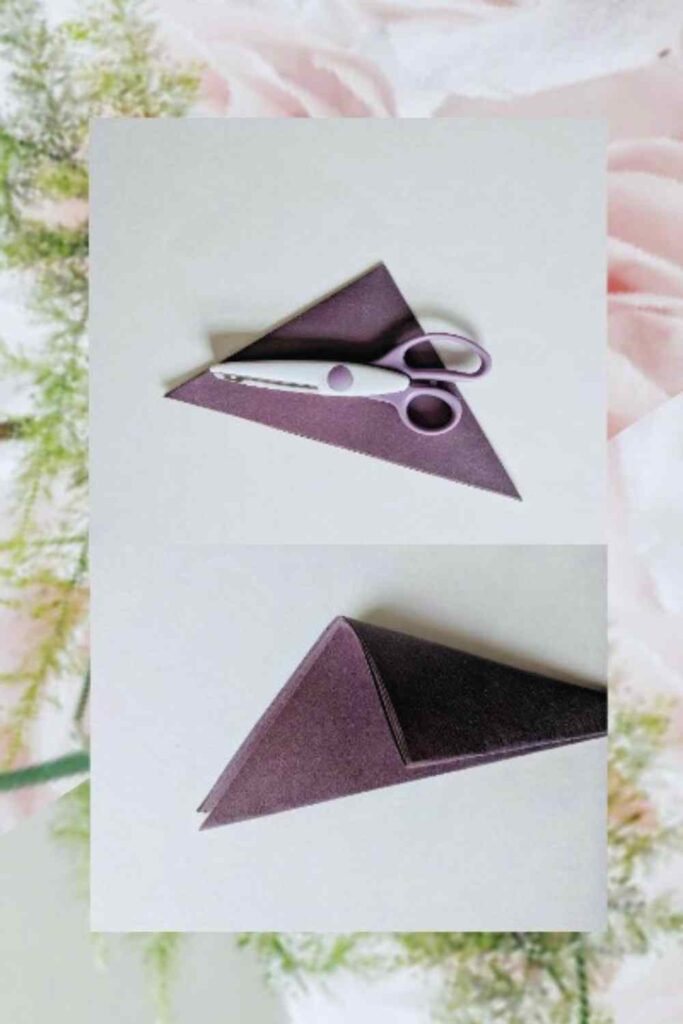
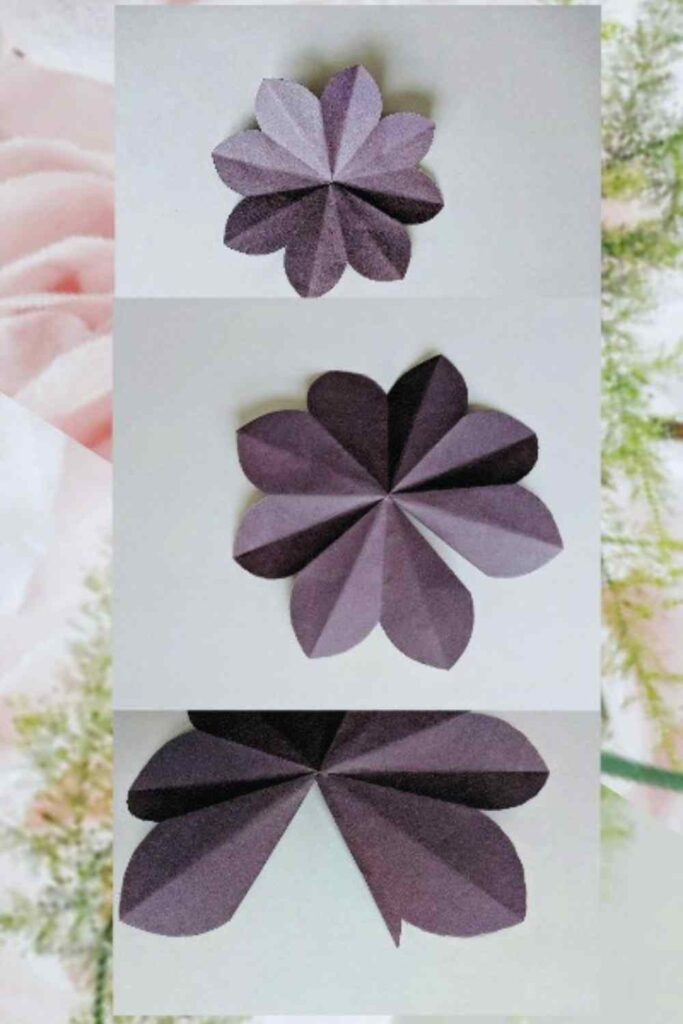
1. Fold a sheet of construction paper in a triangle and cut off the excess. (b) Next, fold the triangle in half, repeating the folds until you have eight layers.
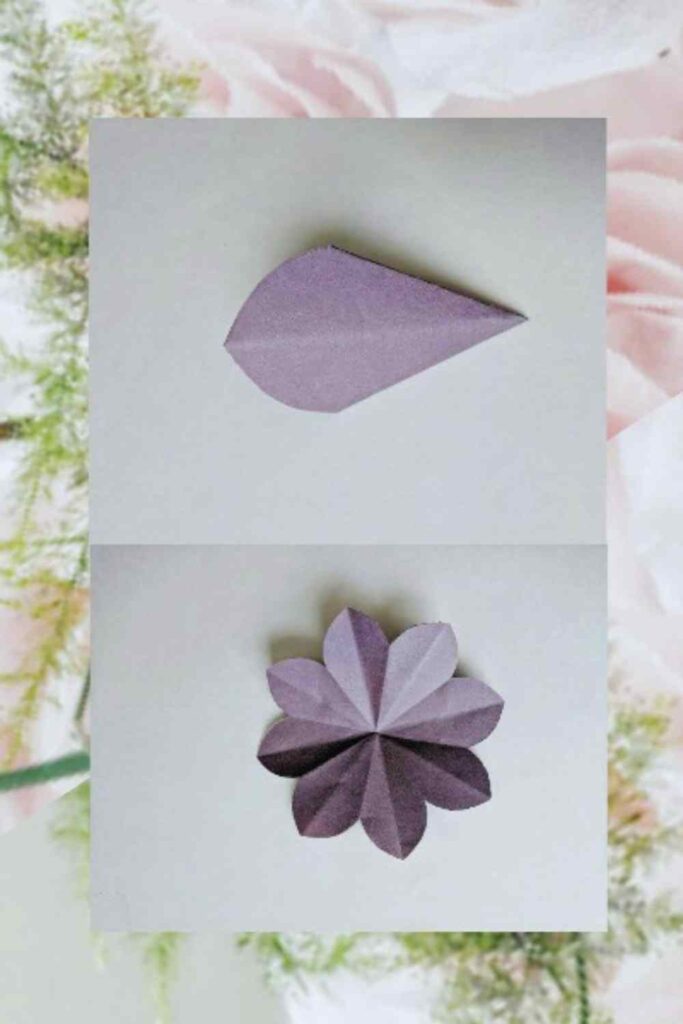
2. To create the petals, hold the layers of the paper together, and starting from the lowest creased point, cut through the layers of the triangles into an oval shape, and open it.
3. Use your scissors to cut away one section from the circle of connected petals and leave a 1/2-inch intact on one side.
4. Use a glue stick to apply adhesive along the underlay, as in the image below on the left. (b) Next, join the petals by placing the edge of the neighbouring part on top of the underlying segment, meeting the crease.
5. After the petals dry, use a wooden/bamboo skewer to poke a hole through the middle. There you have it, a construction paper flower base that allows for myriad varieties.
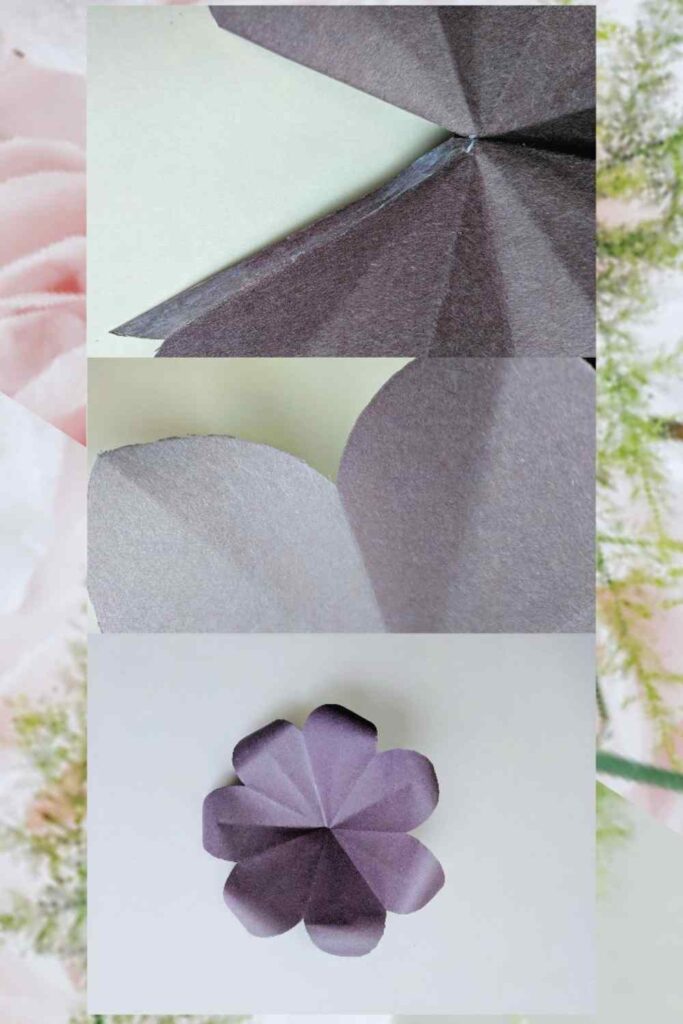
6. Accommodate bulkier stems and centres by widening the opening in the middle of the petals with scissors.
7. Finish by applying hot glue in a circle at the middle of the petals, and push the centre/stem through the opening. Press the papers together with your fingers, using caution handling hot glue.
Remember, it’s easy to add paper leaves to your flowers if you want.
Where To Buy Construction Paper
Buy construction paper online, at a brick-and-mortar store, or anywhere that sells school art and craft supplies.
Construction Paper Facts and Features
- Available in a variety of bright colours with a smooth finish, and those of better qualities resist fading
- It’s easy to cut, makes clean folds, and offers varied strengths and thicknesses.
- Value-priced, available in pads, easy to carry, and recyclable
- Besides, it’s chlorine-free and non-toxic.
Closing Thoughts
Now is the perfect time to gather inspiration with a package of construction paper and delight in making clusters of easy paper flowers. Subscribe to your imagination; you’ll love it.
As always, Thank you so much for visiting.
If the Lord will; see you next time.